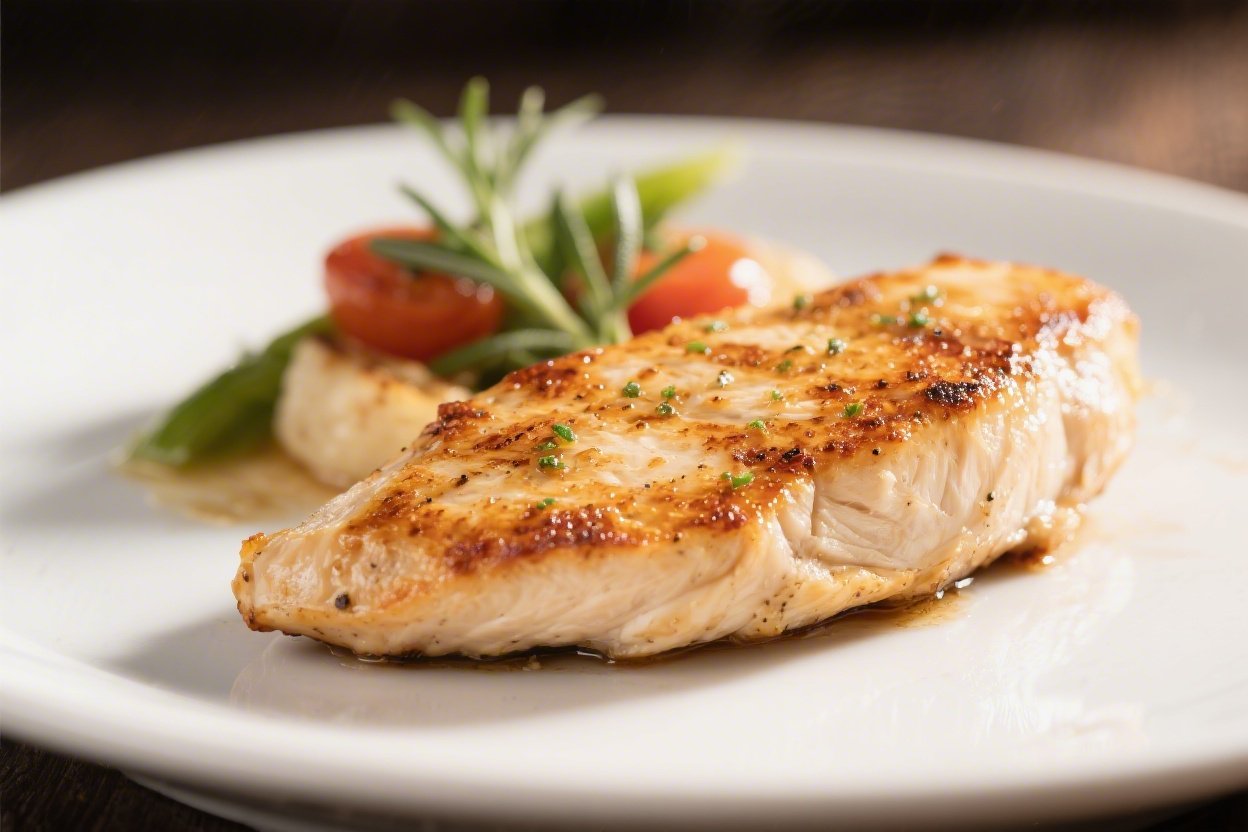
Juicy Tender Chicken Breast (Pan-Seared) – Reliable, Quick, and Flavorful
Pan-seared chicken breast doesn’t have to be dry or boring. With the right technique, you can get juicy, tender meat and a golden crust in under 20 minutes. This recipe keeps things simple and delivers big on flavor.
It’s perfect for weeknights, meal prep, or pairing with a salad, pasta, or rice. Once you nail the timing and heat, this will be your go-to method for perfectly cooked chicken.
Juicy Tender Chicken Breast (Pan-Seared) - Reliable, Quick, and Flavorful
Ingredients
Method
- Prep the chicken: Pat the chicken breasts dry with paper towels. Place each breast between two sheets of plastic wrap or parchment and gently pound to an even 1/2–3/4 inch thickness.This helps them cook evenly and stay tender.
- Season generously: In a small bowl, mix the salt, pepper, garlic powder, onion powder, paprika, and oregano. Sprinkle the blend on both sides of the chicken and press it in so it adheres.
- Heat the pan: Set a large stainless steel or cast-iron skillet over medium-high heat. Add the olive oil and let it shimmer.The pan is ready when a drop of water sizzles on contact.
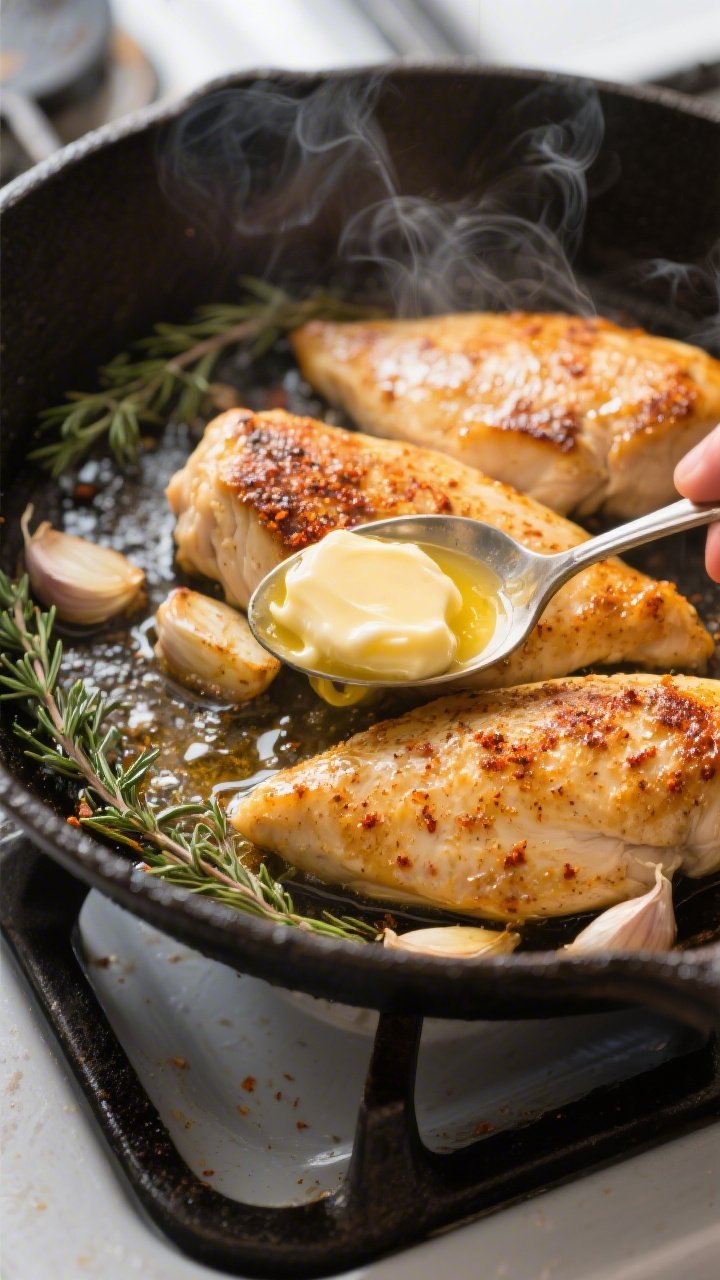
- Sear the first side: Lay the chicken breasts in the hot pan without crowding. Do not move them for 4–6 minutes. You want a deep golden crust.If the oil is smoking heavily, lower the heat slightly.
- Flip and finish: Turn the chicken and lower the heat to medium. Cook another 4–6 minutes, or until the thickest part reads 160–165°F (71–74°C) on an instant-read thermometer. Thicker pieces may need a minute more.
- Optional butter baste: Add the butter to the pan during the final minute.Tilt the pan and spoon the melted butter over the chicken for extra flavor and sheen.
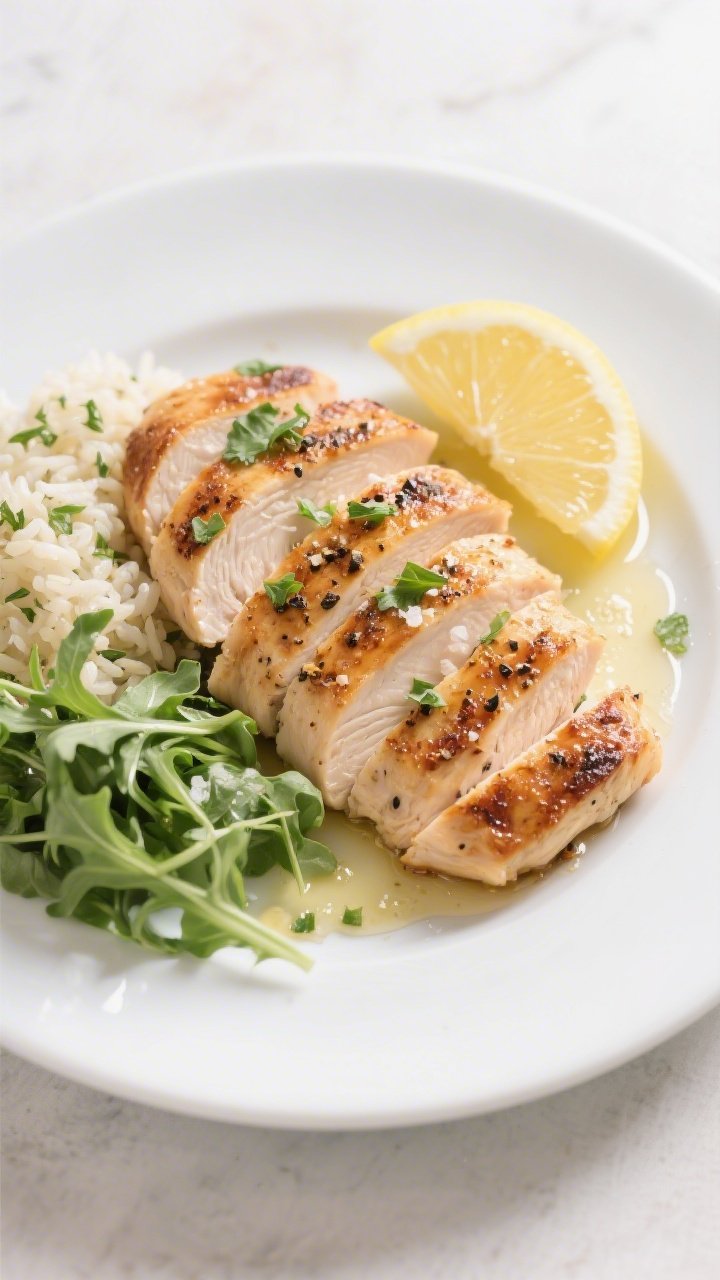
- Rest and brighten: Transfer the chicken to a plate and let it rest for 5 minutes. Squeeze a little lemon juice over the top if you like. Slice against the grain and serve.
What Makes This Recipe So Good
- Fast and fuss-free: From fridge to table in about 20 minutes.
- Consistently juicy: A quick pound to even thickness and a short rest keep the meat tender.
- Golden crust: Pan-searing in a hot skillet builds flavor and locks in moisture.
- Flexible seasoning: Use a simple blend or your favorite spice mix—both work.
- Minimal cleanup: One skillet, a few pantry staples, and you’re done.
Ingredients
- 2 boneless, skinless chicken breasts (about 8–10 oz each)
- 1–2 tablespoons olive oil (or a mix of olive oil and butter)
- 1 teaspoon kosher salt (adjust to taste)
- 1/2 teaspoon black pepper
- 1 teaspoon garlic powder
- 1/2 teaspoon onion powder
- 1/2 teaspoon smoked paprika (or sweet paprika)
- 1/2 teaspoon dried oregano or Italian seasoning (optional)
- 1 tablespoon butter (optional, for finishing)
- 1–2 teaspoons lemon juice (optional, for brightness)
Step-by-Step Instructions
- Prep the chicken: Pat the chicken breasts dry with paper towels. Place each breast between two sheets of plastic wrap or parchment and gently pound to an even 1/2–3/4 inch thickness.This helps them cook evenly and stay tender.
- Season generously: In a small bowl, mix the salt, pepper, garlic powder, onion powder, paprika, and oregano. Sprinkle the blend on both sides of the chicken and press it in so it adheres.
- Heat the pan: Set a large stainless steel or cast-iron skillet over medium-high heat. Add the olive oil and let it shimmer.The pan is ready when a drop of water sizzles on contact.
- Sear the first side: Lay the chicken breasts in the hot pan without crowding. Do not move them for 4–6 minutes. You want a deep golden crust.If the oil is smoking heavily, lower the heat slightly.
- Flip and finish: Turn the chicken and lower the heat to medium. Cook another 4–6 minutes, or until the thickest part reads 160–165°F (71–74°C) on an instant-read thermometer. Thicker pieces may need a minute more.
- Optional butter baste: Add the butter to the pan during the final minute.Tilt the pan and spoon the melted butter over the chicken for extra flavor and sheen.
- Rest and brighten: Transfer the chicken to a plate and let it rest for 5 minutes. Squeeze a little lemon juice over the top if you like. Slice against the grain and serve.
How to Store
- Refrigerate: Cool completely, then store in an airtight container for up to 4 days.
- Freeze: Slice or leave whole, wrap tightly, and freeze for up to 3 months.Thaw overnight in the fridge.
- Reheat gently: Warm in a covered skillet over low heat with a splash of broth or water for 3–5 minutes, or microwave in short bursts to avoid drying out.
Benefits of This Recipe
- Lean protein, great flavor: You get a high-protein main that still tastes rich and satisfying.
- Budget-friendly: Simple pantry ingredients and a common cut of meat keep costs low.
- Meal prep ready: Cooks fast, stores well, and fits into many meals throughout the week.
- Customizable: Switch up spices, add sauces, or pair with different sides without changing the core method.
Pitfalls to Watch Out For
- Overcooking: Dry chicken happens fast. Use a thermometer and pull at 160–165°F; carryover heat will finish the job.
- Uneven thickness:</-strong> Skipping the pound step leads to overdone thin ends and undercooked centers.
- Cold pan: If the pan isn’t hot, you won’t get a good crust, and the chicken may steam.
- Moving it too soon: Let the crust form before flipping. If it sticks, give it another 30 seconds.
- Undersalting: Chicken needs enough salt to taste like something.Season both sides evenly.
Variations You Can Try
- Herb butter finish:</-strong> Stir chopped parsley, chives, and a pinch of lemon zest into the butter before basting.
- Cajun style: Swap the seasoning for a Cajun blend and finish with a squeeze of lime.
- Lemon pepper: Use lemon pepper seasoning and finish with extra black pepper and fresh lemon juice.
- Garlic-thyme: Add smashed garlic cloves and thyme sprigs to the pan in the last few minutes and baste.
- Honey mustard glaze: In the final minute, brush on a quick mix of Dijon, honey, and a dash of apple cider vinegar.
- Creamy pan sauce: Remove the chicken, then deglaze the skillet with chicken broth and a splash of cream. Simmer to thicken and spoon over slices.
FAQ
How do I know when the chicken is done without a thermometer?
Aim for firm but springy. The juices should run clear, and the thickest part should no longer look translucent.
That said, a thermometer is the most reliable tool and helps prevent overcooking.
Can I use chicken tenders or cutlets instead?
Yes. Tenders or cutlets cook faster—usually 2–3 minutes per side. Watch them closely, since they can dry out quickly due to their smaller size.
Which pan is best for searing?
Cast iron or stainless steel gives the best crust.
Nonstick works in a pinch, but you won’t get the same browning. Make sure the pan is preheated well before adding the chicken.
Do I have to pound the chicken?
You don’t have to, but it makes a big difference. Even thickness equals even cooking, which means juicier meat and less guesswork.
What oil should I use?
Use an oil with a moderate to high smoke point like olive oil, avocado oil, or canola.
For extra flavor, finish with a small pat of butter near the end rather than cooking in butter the whole time.
Why is my chicken sticking to the pan?
The pan might not be hot enough, or you tried to flip too soon. Once a crust forms, the chicken will naturally release. Also, be sure the surface is dry before seasoning and searing.
Can I brine the chicken first?
Yes.
A quick 15–30 minute wet brine (salted water) or a dry brine (salted and refrigerated uncovered for a few hours) adds moisture and flavor. Pat dry well before searing.
In Conclusion
Pan-seared chicken breast can be flavorful, juicy, and weeknight-easy with a few simple habits: pound to even thickness, season well, use a hot pan, and don’t overcook. This method delivers a golden crust and tender meat every time.
Keep the base recipe as your anchor, then play with spices, herbs, and sauces to match your mood or menu. Once you try it, you’ll have a reliable staple that fits into almost any meal.