Traditional Italian Bread Loaf – Simple, Rustic, and Flavorful
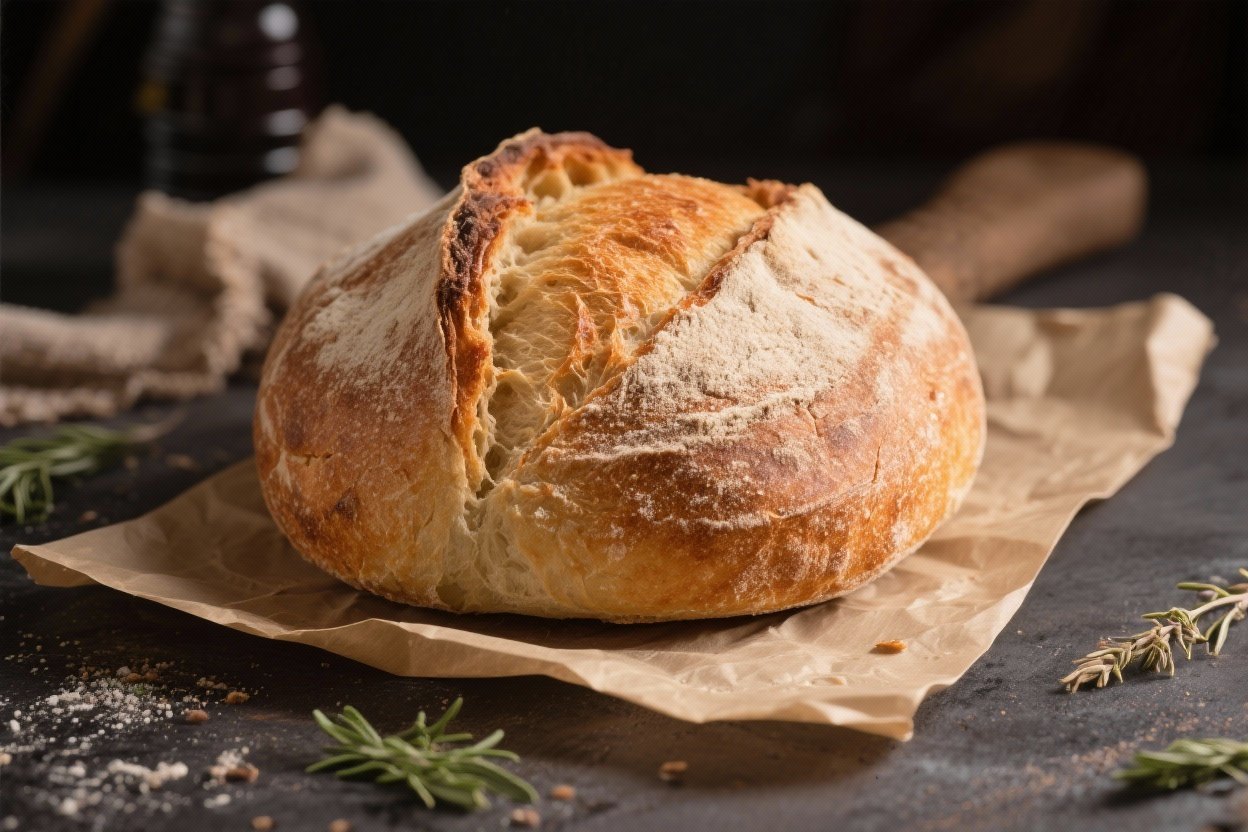
Italian bread is the kind of loaf that fills your kitchen with a warm, toasty aroma and makes everything taste better. It’s humble, golden, and deeply satisfying—just what you want on the table alongside a bowl of soup or a plate of pasta. This version stays true to tradition with a crisp crust, tender crumb, and a clean, comforting flavor.
You don’t need fancy tools or special flour, just a little time and a calm approach. If you’re new to bread making, this is a great place to start.
Traditional Italian Bread Loaf - Simple, Rustic, and Flavorful
Ingredients
Method
- Proof the yeast. In a large bowl, mix warm water with sugar or honey.Sprinkle in the yeast and let it sit for 5–10 minutes until foamy. If it doesn’t foam, your water may be too hot or the yeast is inactive.
- Combine the dry ingredients. In a separate bowl, whisk the flour and salt. If you’re using instant yeast, add it directly to the flour instead of proofing.
- Bring the dough together. Add the flour mixture to the yeast mixture.Stir with a wooden spoon until a shaggy dough forms. Add the olive oil if using and mix until incorporated.
- Knead until smooth. Transfer the dough to a lightly floured surface. Knead for 8–10 minutes until the dough is smooth, elastic, and slightly tacky but not sticky.Add flour sparingly as needed.
- First rise. Place the dough in a lightly oiled bowl, turning it once to coat. Cover with a damp towel or plastic wrap. Let rise at room temperature for 60–90 minutes, or until doubled in size.
- Shape the loaf. Gently deflate the dough and turn it onto a clean surface.Flatten into a rectangle, then roll it up tightly from the long side into a cylinder. Pinch the seam closed and tuck the ends under for a neat oval or batard shape.
- Second rise. Place the shaped loaf seam-side down on a parchment-lined baking sheet dusted with cornmeal or semolina. Cover lightly and let rise 30–45 minutes, until puffy and slightly springy to the touch.
- Preheat the oven. Set your oven to 450°F (230°C).Place a baking stone or an inverted sheet pan inside to heat. Put a metal pan on the lower rack for steam.
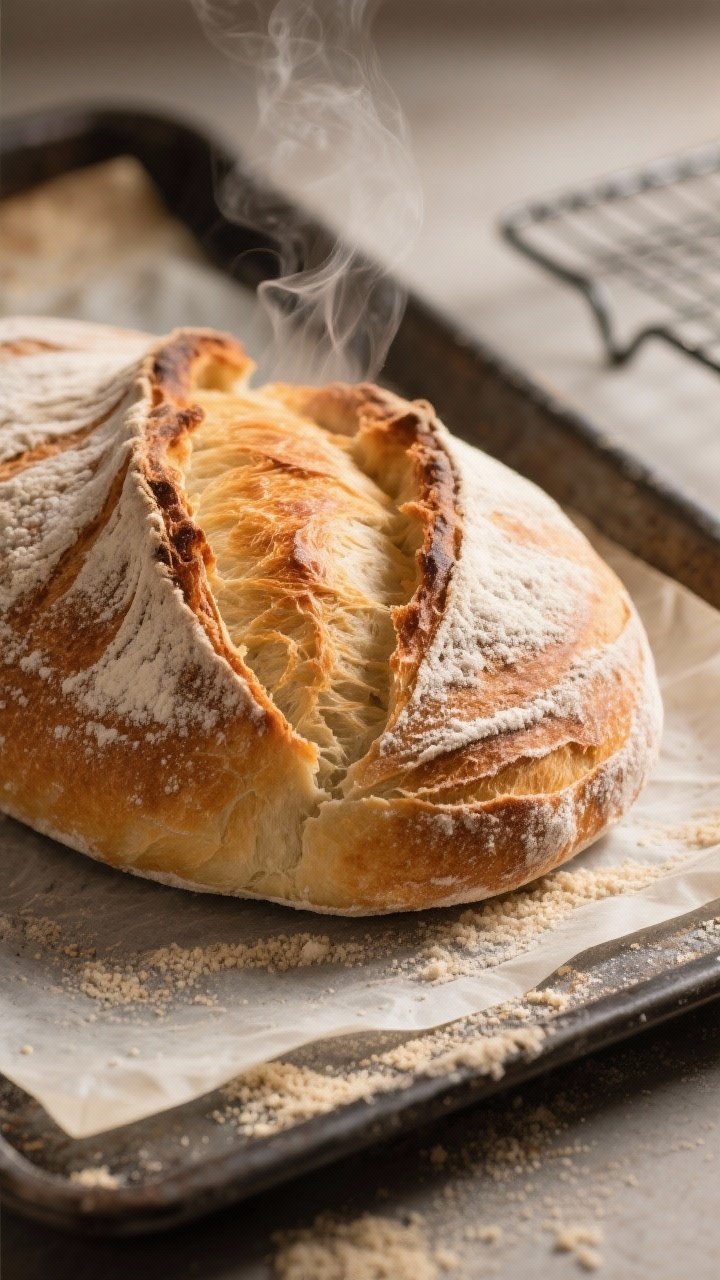
- Score the loaf. Using a sharp knife or lame, make 3–4 diagonal slashes across the top. This helps the bread expand without bursting.
- Steam and bake. Slide the loaf (on parchment) onto the hot stone or pan.Carefully pour a cup of hot water into the steam pan and close the oven door quickly. Bake for 25–30 minutes until deep golden and the loaf sounds hollow when tapped.
- Cool properly. Transfer to a wire rack and let cool at least 45 minutes before slicing. Cooling sets the crumb and improves flavor.
What Makes This Special
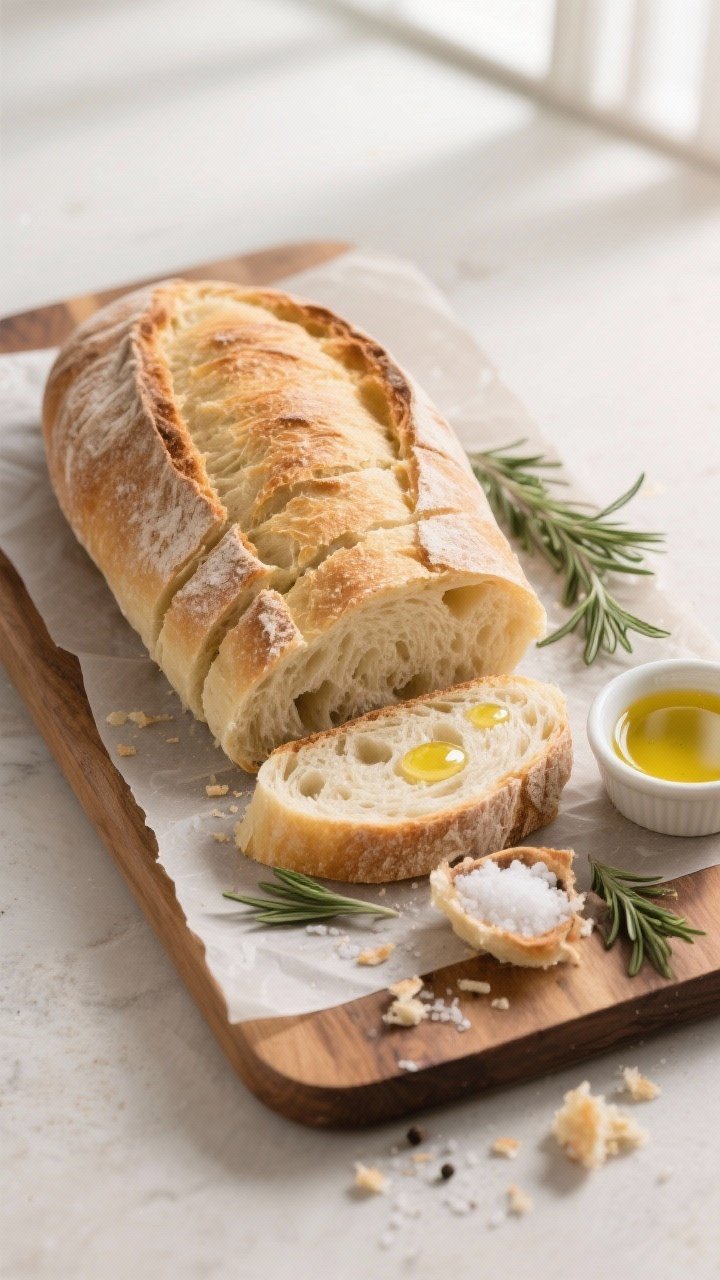
Traditional Italian bread is all about balance: a crust that crackles when you slice it and a soft interior that’s perfect for dipping. There’s no heavy sweetness, no butter, and no fuss—just simple ingredients and good technique.
The slow rise gives the loaf a mild, slightly nutty flavor and better digestion. It’s a bread that works for everything: sandwiches, bruschetta, or just torn by hand and drizzled with olive oil. It’s also forgiving, which means you can make it on a weekend and feel like a pro.
What You’ll Need
- 4 cups (500 g) bread flour (or a mix of 3 cups bread flour + 1 cup all-purpose)
- 1 1/2 cups (360 ml) warm water (about 105–110°F / 40–43°C)
- 2 teaspoons (7 g) active dry yeast (or 1 1/2 teaspoons instant yeast)
- 2 teaspoons (10 g) fine sea salt
- 1 tablespoon (15 ml) olive oil (optional, for a softer crumb)
- 1 teaspoon sugar or honey (to help activate the yeast)
- Extra flour for dusting
- Cornmeal or semolina for the baking surface (optional)
- Water in a spray bottle (optional, for steam and a crisper crust)
Instructions
- Proof the yeast. In a large bowl, mix warm water with sugar or honey.Sprinkle in the yeast and let it sit for 5–10 minutes until foamy. If it doesn’t foam, your water may be too hot or the yeast is inactive.
- Combine the dry ingredients. In a separate bowl, whisk the flour and salt. If you’re using instant yeast, add it directly to the flour instead of proofing.
- Bring the dough together. Add the flour mixture to the yeast mixture.Stir with a wooden spoon until a shaggy dough forms. Add the olive oil if using and mix until incorporated.
- Knead until smooth. Transfer the dough to a lightly floured surface. Knead for 8–10 minutes until the dough is smooth, elastic, and slightly tacky but not sticky.Add flour sparingly as needed.
- First rise. Place the dough in a lightly oiled bowl, turning it once to coat. Cover with a damp towel or plastic wrap. Let rise at room temperature for 60–90 minutes, or until doubled in size.
- Shape the loaf. Gently deflate the dough and turn it onto a clean surface.Flatten into a rectangle, then roll it up tightly from the long side into a cylinder. Pinch the seam closed and tuck the ends under for a neat oval or batard shape.
- Second rise. Place the shaped loaf seam-side down on a parchment-lined baking sheet dusted with cornmeal or semolina. Cover lightly and let rise 30–45 minutes, until puffy and slightly springy to the touch.
- Preheat the oven. Set your oven to 450°F (230°C).Place a baking stone or an inverted sheet pan inside to heat. Put a metal pan on the lower rack for steam.
- Score the loaf. Using a sharp knife or lame, make 3–4 diagonal slashes across the top. This helps the bread expand without bursting.
- Steam and bake. Slide the loaf (on parchment) onto the hot stone or pan.Carefully pour a cup of hot water into the steam pan and close the oven door quickly. Bake for 25–30 minutes until deep golden and the loaf sounds hollow when tapped.
- Cool properly. Transfer to a wire rack and let cool at least 45 minutes before slicing. Cooling sets the crumb and improves flavor.
How to Store
- Room temperature: Keep the loaf in a paper bag or wrapped in a clean towel for up to 2 days.Avoid plastic unless you prefer a softer crust.
- Freezing: Slice the bread, wrap tightly in plastic, then foil, and freeze for up to 2 months. Toast slices straight from frozen.
- Reviving the crust: If the crust softens, reheat the loaf in a 350°F (175°C) oven for 8–10 minutes.
Why This is Good for You
- Simple ingredients: Flour, water, yeast, and salt—no additives or preservatives.
<li
Slow fermentation benefits:
- A longer rise can make bread easier to digest and enhance flavor.
- Balanced energy: Paired with protein and healthy fats, it makes a satisfying, steady meal.
- Versatility: One loaf can become toast, sandwiches, bruschetta, or a side for soups and salads.
What Not to Do
- Don’t rush the rise. Under-proofed dough leads to dense bread and weak flavor.
- Don’t add too much flour. A slightly tacky dough bakes up lighter. Over-flouring makes it dry.
- Don’t skip scoring. Without slashes, the loaf may burst at the sides.
- Don’t cut while hot. Slicing too soon compresses the crumb and makes it gummy.
- Don’t store in the fridge. Refrigeration stales bread faster than room temperature.
Alternatives
- Flour swaps: Use half all-purpose and half bread flour for a softer crumb, or add 1/2 cup semolina for a golden color and rustic bite.
- Preferment option: Mix 1 cup flour, 1/2 cup water, and a pinch of yeast the night before.Let it sit covered at room temp. Add to the dough for deeper flavor.
- Olive oil loaf: Increase olive oil to 2 tablespoons for a tender, slightly richer bread.
- Herb variation: Add 1–2 teaspoons dried rosemary or oregano to the dough for an aromatic twist.
- Dutch oven method: Shape into a round. Preheat a Dutch oven at 450°F (230°C).Place dough on parchment, score, and bake covered for 20 minutes, then uncovered for 10–15 minutes.
FAQ
Can I use instant yeast instead of active dry?
Yes. Use 1 1/2 teaspoons instant yeast and mix it directly with the flour and salt. Skip the proofing step, but keep the rest of the process the same.
How do I know when the dough is kneaded enough?
The dough should feel smooth and elastic and spring back when pressed.
If you stretch a small piece, it should form a thin, almost translucent “window” without tearing easily.
Why is my bread dense?
Common reasons are not enough kneading, water that was too hot and killed the yeast, or cutting the rise time short. Also check that your flour-to-water ratio wasn’t too dry.
Can I make this bread overnight?
Yes. After kneading, cover the dough and refrigerate overnight.
Bring it back to room temperature, shape, proof, and bake. The flavor will be more complex.
What’s the best way to get a crisp crust?
Bake with steam during the first 10 minutes. Use a preheated stone, add hot water to a preheated pan, or spritz the oven walls with water right after loading the loaf.
Why did my loaf split on the side?
It likely needed deeper or better-placed scores, or it was under-proofed.
Make sure the dough has risen enough and score at a slight angle about 1/4 inch deep.
Can I make two smaller loaves?
Yes. Divide the dough after the first rise, shape into two smaller loaves, and bake 5–8 minutes less. Keep an eye on color and doneness.
Final Thoughts
This traditional Italian bread loaf is proof that simple baking can be deeply rewarding.
With basic ingredients and a little patience, you get a golden, crackling crust and a soft, open crumb that suits almost any meal. Keep your steps steady, respect the rise, and don’t overthink it. Once you taste that first slice, warm and fragrant, you’ll want to make it a weekly habit.