16 Kitchen Shelf Decor Ideas That Spark Serious Joy
Your kitchen shelves deserve better than random mugs and dusty spices. With a few smart moves, you can turn them into a mini design moment that still works hard for everyday life.
Ready for inspiration you can actually use (and not just pin)? Let’s style those shelves so they look intentional, cohesive, and yes—totally drool-worthy.
1. Color-Code Your Everyday Basics
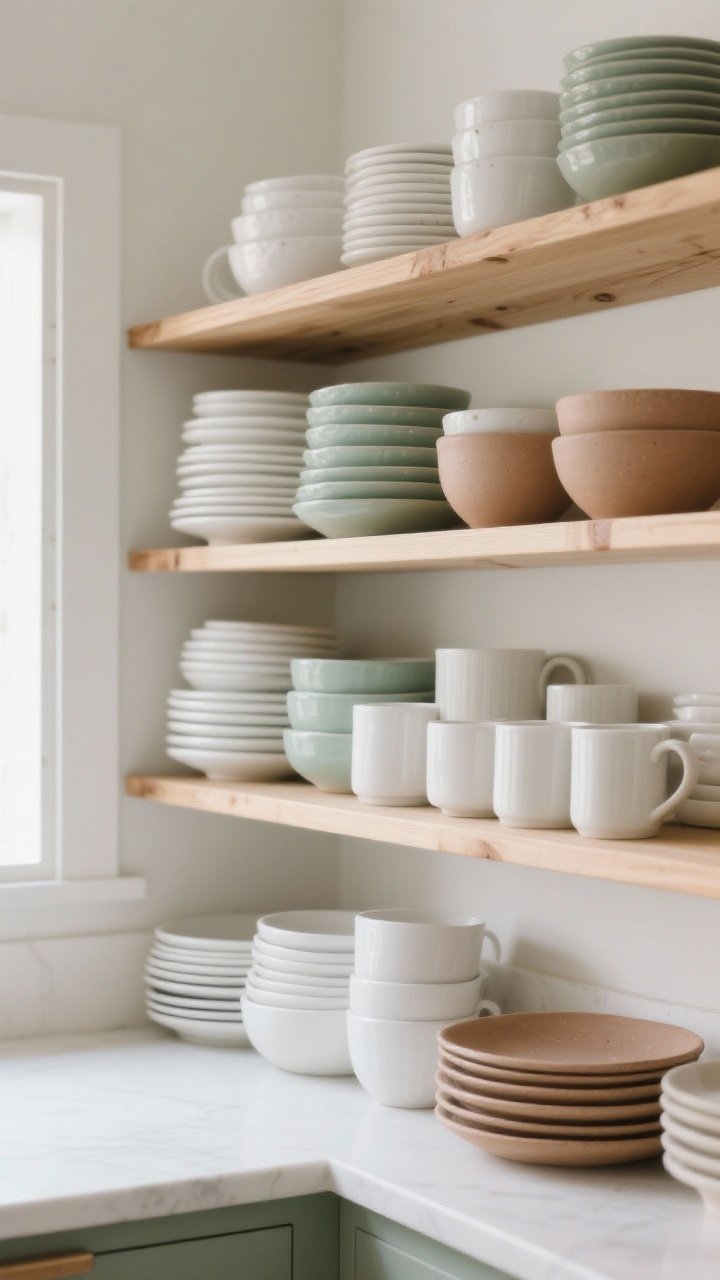
Color-coding isn’t just for bookshelves. Group your plates, bowls, and mugs by color and watch your shelves transform from “storage” to “styled.” It’s ridiculously satisfying—and it makes finding things faster.
Quick Tips
- Stick to a palette: Choose 2–3 colors and repeat them on every shelf for cohesion.
- Use neutrals as anchors: White or wood tones keep brighter shades from feeling chaotic.
- Mix finishes: Glossy ceramics + matte stoneware = instant texture.
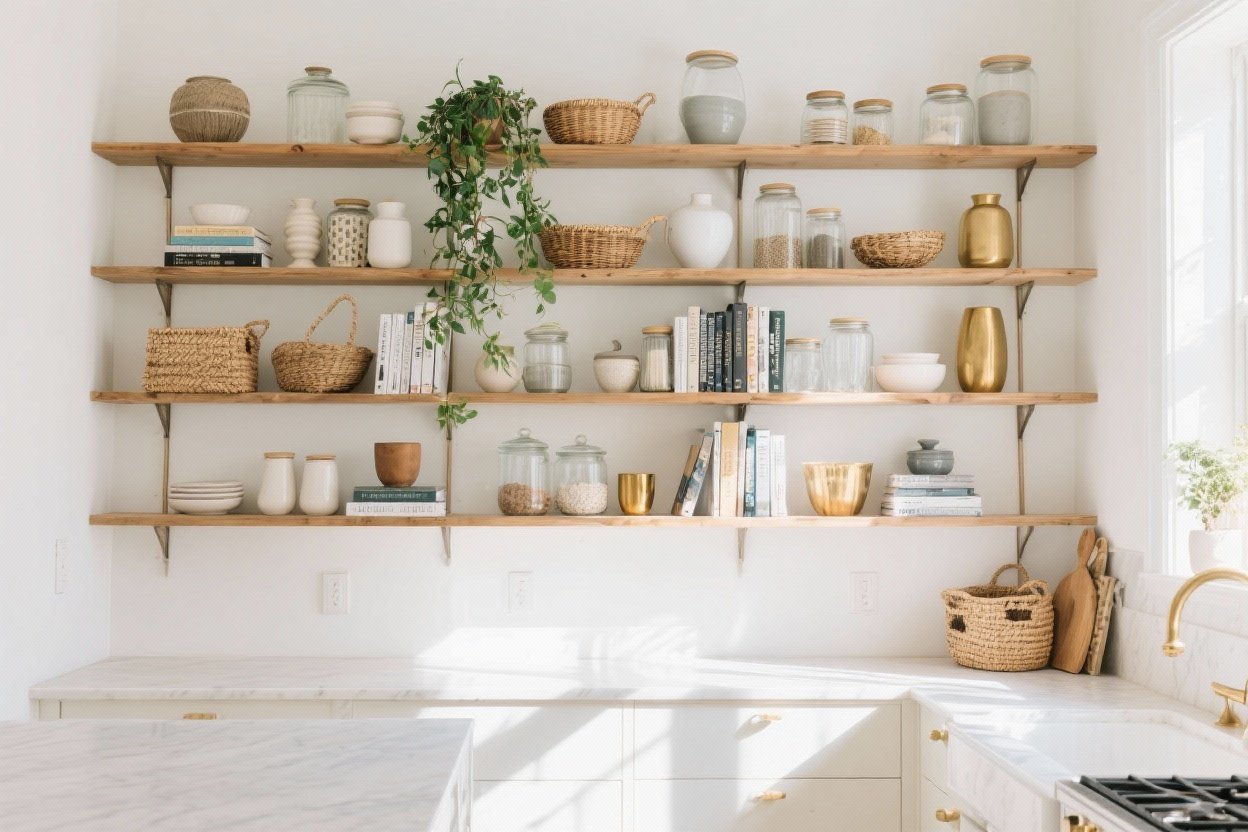
2. Layer Textures Like a Pro
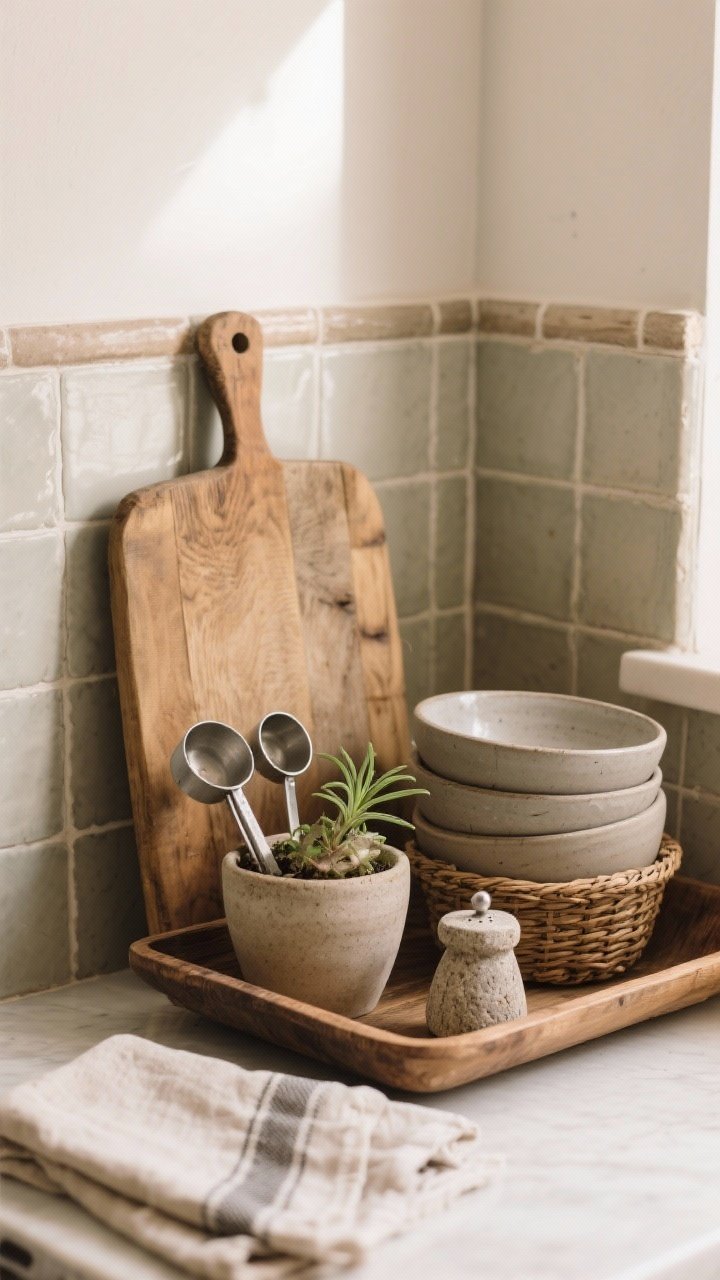
Texture is the secret to shelves that feel designer without trying too hard. Pair smooth ceramics with woven baskets, rustic wood cutting boards, and linen napkins for depth.
Try This Combo
- Base layer: Propped cutting boards or a shallow tray against the wall.
- Middle layer: Stack bowls or nest measuring cups.
- Front layer: Add a small plant or salt cellar to soften the edges.
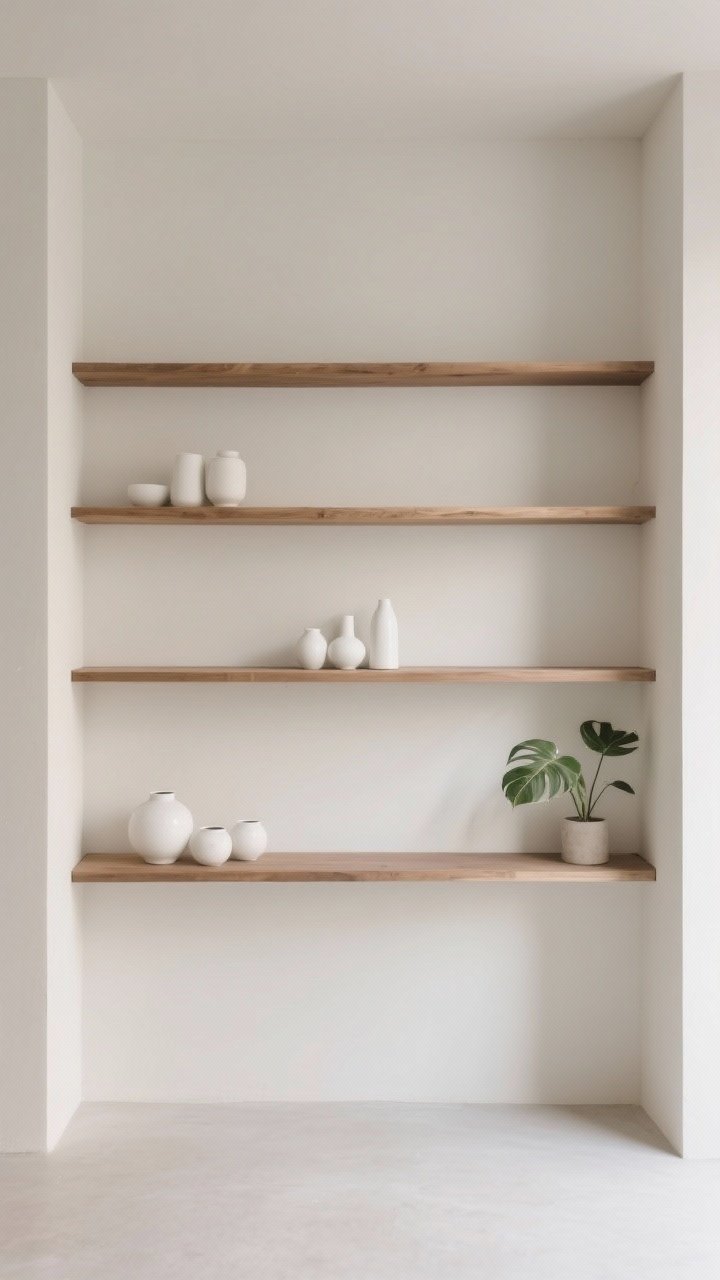
3. Style in Visual Triangles
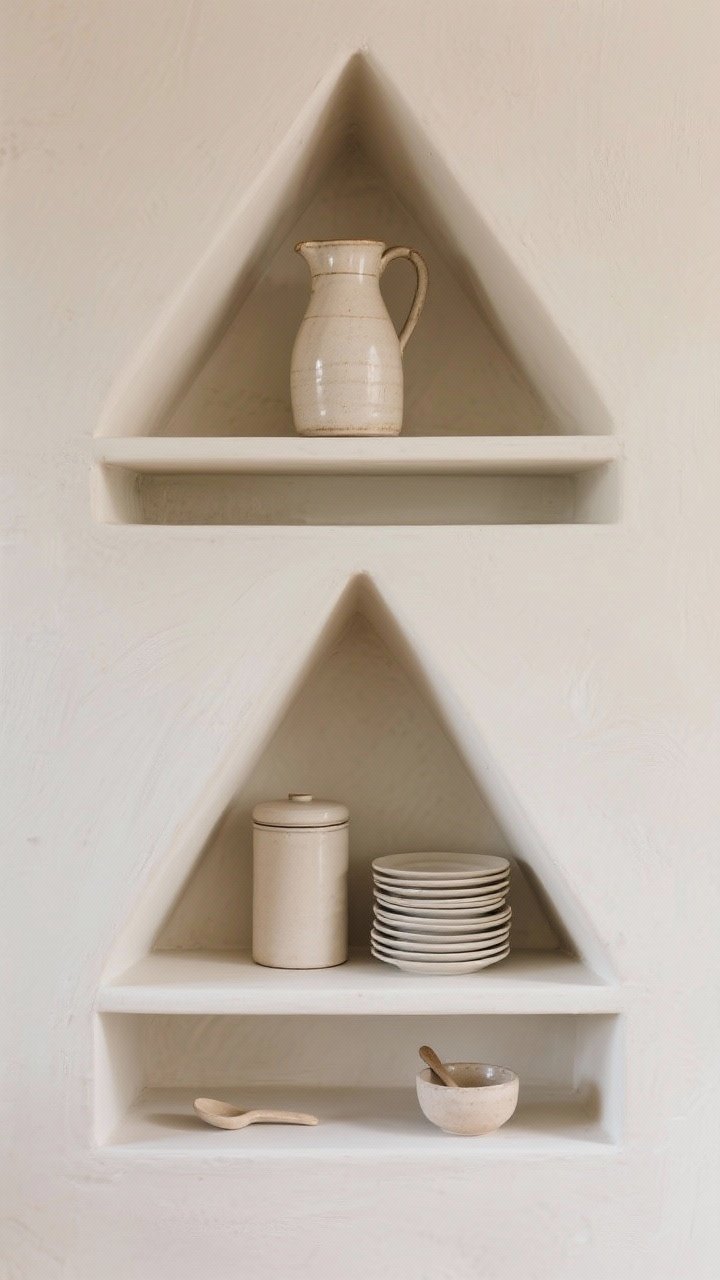
Designers use “triangle styling” to keep your eye moving in a pleasing way. Create highs, mediums, and lows with your pieces so nothing feels flat or cluttered.
How to Build a Triangle
- Tall: A vase or pitcher at one end.
- Medium: A stack of plates or a canister in the middle.
- Low: A small bowl or spoon rest in front.
Repeat this across shelves, and boom—balanced and beautiful.
4. Showcase Pretty Pantry Staples

Functional can be cute. Pour flour, sugar, pasta, and beans into clear jars and line them up like a curated pantry. It’s practical and doubles as decor—plus, you’ll actually know when you’re out of rice.
Display Tips
- Match your containers: Glass jars with wood or brass lids look polished.
- Add labels: Minimal labels keep it clean and helpful.
- Vary heights: Mix tall spaghetti jars with squat sugar canisters.
5. Bring in a Pop of Green
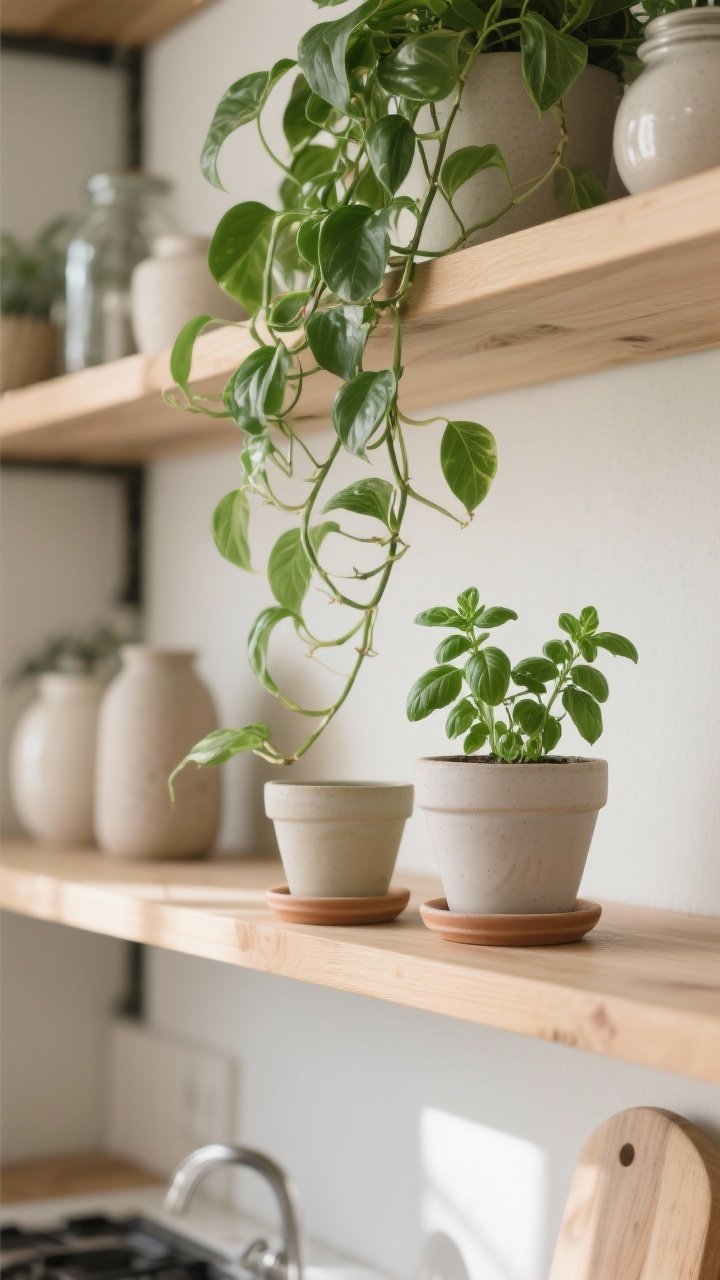
Plants bring shelves to life, both literally and decor-wise. Go low-maintenance with pothos or herbs (hello, basil) and let them trail slightly for movement.
Plant Placement
- One per shelf: Keeps things fresh without turning into a jungle.
- Use a saucer: Protect wood from water rings—future you will be grateful.
- Try faux: If sunlight is scarce, a high-quality faux works. No shame, FYI.
6. Mix Vintage With Modern

Pair a sleek espresso canister with your grandmother’s mixing bowl. That contrast? Chef’s kiss. A few well-chosen vintage pieces add soul to newer kitchens.
What to Hunt For
- Brass candlesticks or weights: Small and sculptural.
- Old cookbooks: Stack horizontally with a bowl on top.
- Antique glass bottles: Pop a single stem or dried florals inside.
7. Curate a Coffee or Tea Moment
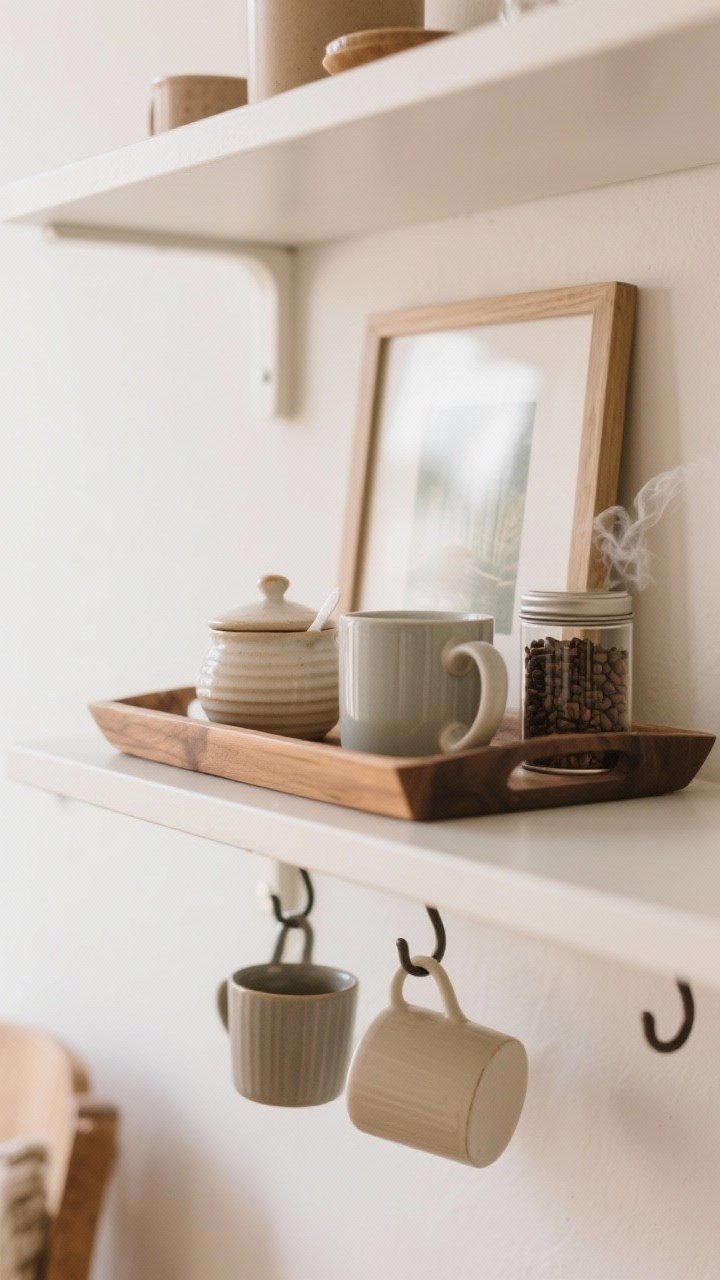
If caffeine is your love language, dedicate a section to it. Corral mugs, a sugar bowl, and your go-to beans or tea tins in one visually tight area.
Make It Functional
- Use a tray: It defines the zone and catches stray grounds.
- Hang hooks: Mini S-hooks below the shelf keep favorite mugs within reach.
- Add art: A tiny framed print behind the setup adds charm.
8. Stack Smart: Books + Bowls
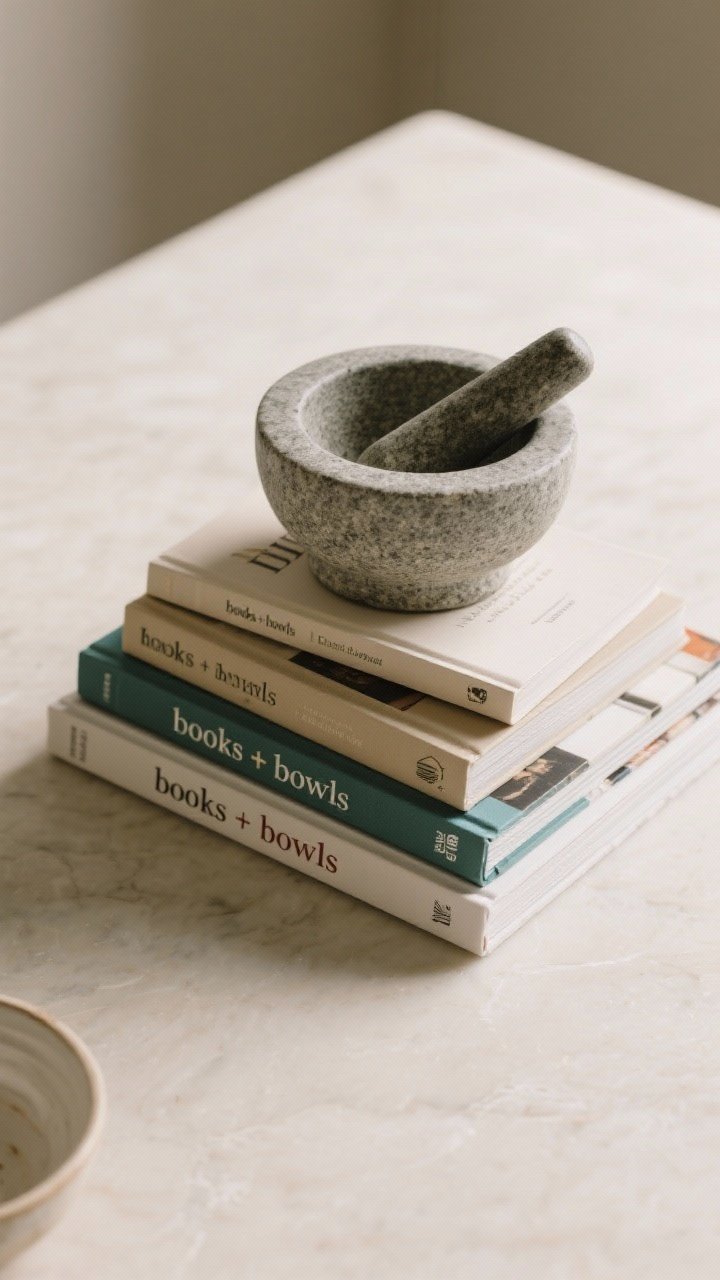
Cookbooks on open shelves? Yes, but stack them intentionally. Mix vertical spines with a few horizontal stacks, and top them with bowls, candles, or a mortar and pestle for dimension.
Styling Formula
- 3–5 books max per cluster: Keeps it light.
- Color-coordinate spines: Or flip them for a neutral pages-out look.
- Top it: Add a small object to break up the lines.
9. Lean Cutting Boards & Art
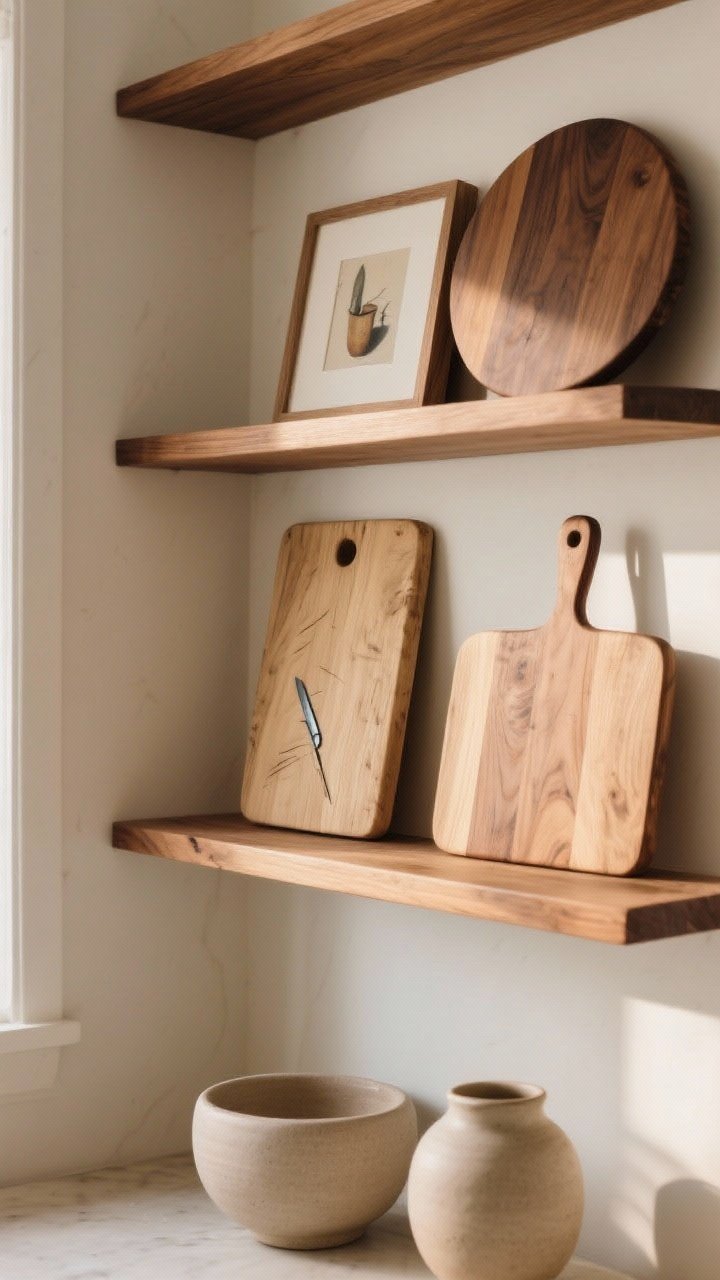
Propping boards and art instantly warms up sterile shelves. It’s the easiest backdrop ever—and it makes the rest of your items feel anchored.
What Works Best
- Vary shapes and woods: Round, rectangular, walnut, oak—mix ’em.
- Layer with a print: A small framed still life or recipe card adds personality.
- Keep one board for actual use: The rest can be decorative; balance is key.
10. Embrace Negative Space
The hardest part of styling? Knowing when to stop. Leave a little breathing room so your shelves feel curated, not crammed.
Easy Rules
- One empty “zone” per shelf: A blank spot lets the eye rest.
- Limit to three groupings: Left, center, right—done.
- Step back often: If it looks busy, remove one thing. Then another.
11. Go Monochrome for Instant Calm

When in doubt, pick one color and go all in. White ceramics, gray stoneware, or black ironstone create a minimal, gallery-like vibe that feels chic without trying.
Monochrome Moves
- Play with shape: Interesting silhouettes keep it from feeling flat.
- Add wood or linen: A natural accent breaks up the monotony.
- Use soft lighting: A tiny plug-in sconce or under-shelf light adds warmth.
12. Display Your Everyday Tools (But Make It Pretty)
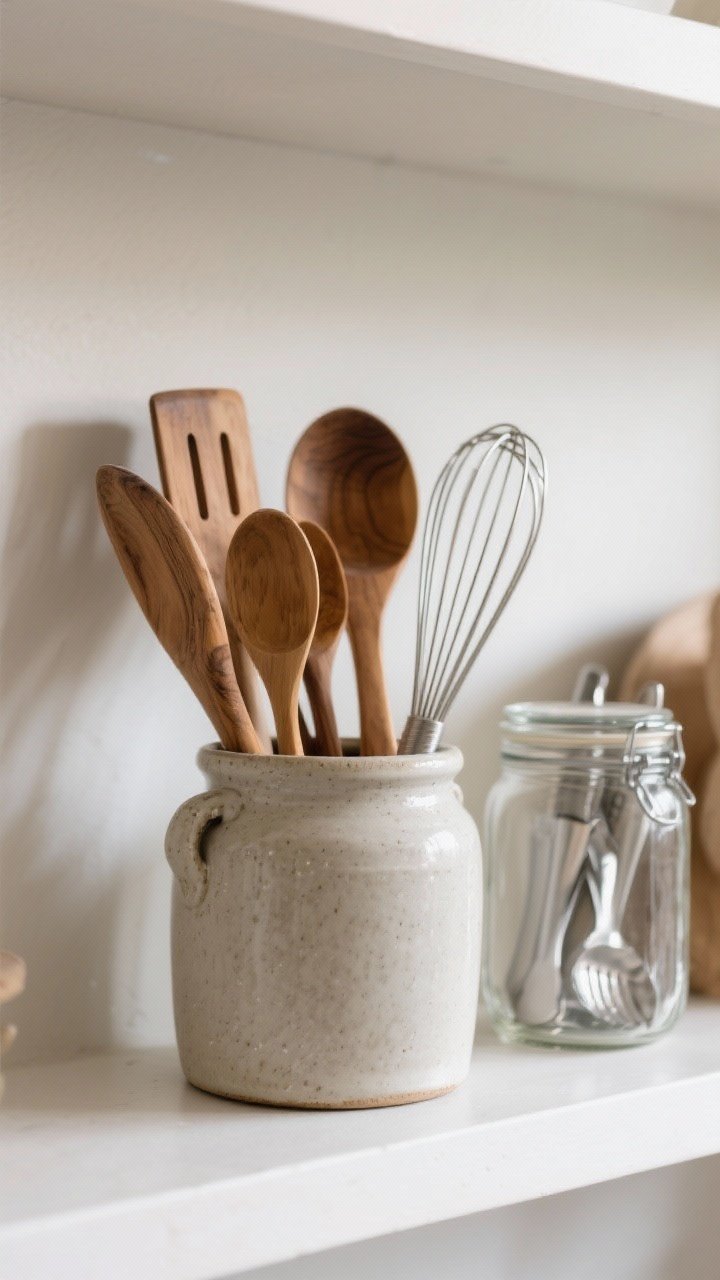
Those pretty spatulas and wooden spoons? Put them out. A stone crock or vintage jar turns utensils into decor and frees up drawer space. Win-win.
Tool Styling
- Choose a single material: All wood or all stainless for a cleaner look.
- Mind the heights: Taller tools in the back, shorter in front.
- Edit often: Keep only the daily-use MVPs on display.
13. Add a Little Shine With Metallics
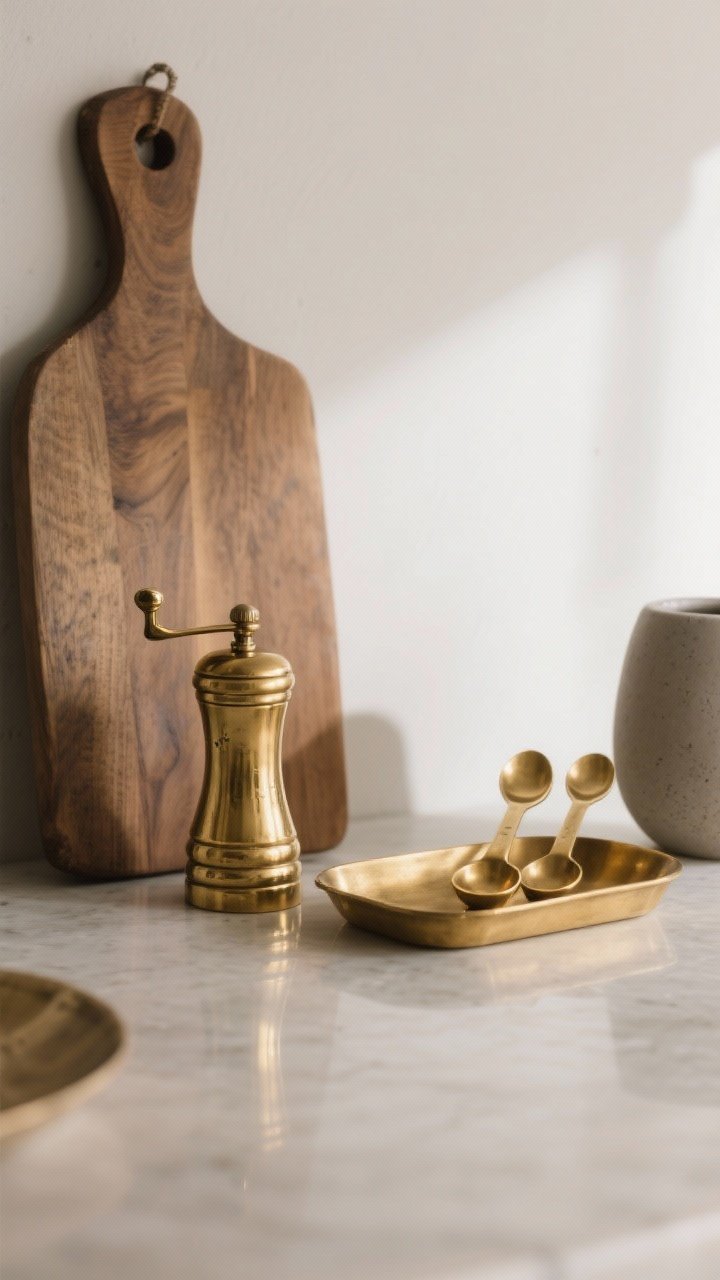
A touch of metal goes a long way. Think brass pepper mills, copper measuring cups, or a chrome espresso maker. The sheen adds contrast and elevates the whole shelf.
How to Use Metallics
- Pick one finish: Brass, copper, or chrome—mixing too many can feel messy.
- Repeat it: Aim for 2–3 pieces in that finish for cohesion.
- Balance with matte: Pair with stone or wood so it doesn’t feel flashy.
14. Seasonal Swap-Outs Without the Clutter
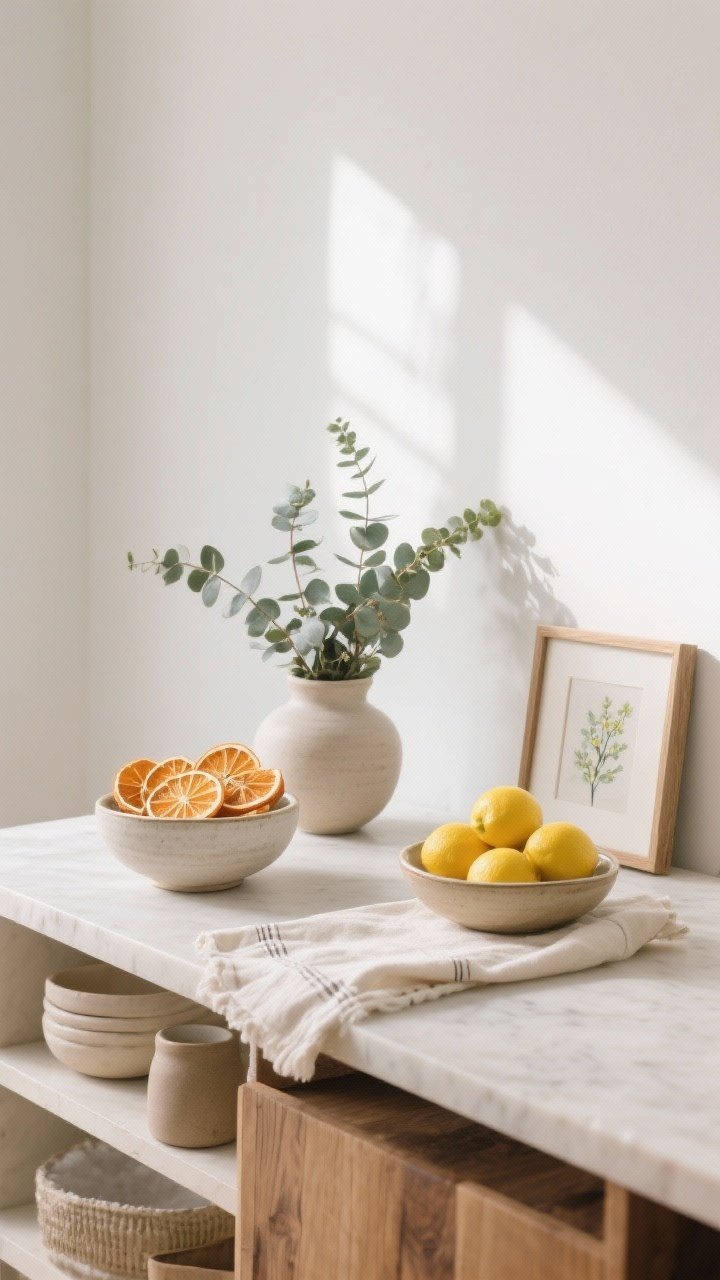
Keep a core setup and rotate a few accents with the seasons—think dried oranges in winter, fresh citrus in spring, or a bundle of eucalyptus in fall. Small changes = big mood shift.
Low-Effort Updates
- Swap textiles: Change napkins or tea towels for new colors.
- Change one art piece: A small framed print can set the tone.
- Use a seasonal bowl: Fill it with apples, lemons, or pinecones (not together, IMO).
15. Create Balance With Symmetry (But Not Too Much)
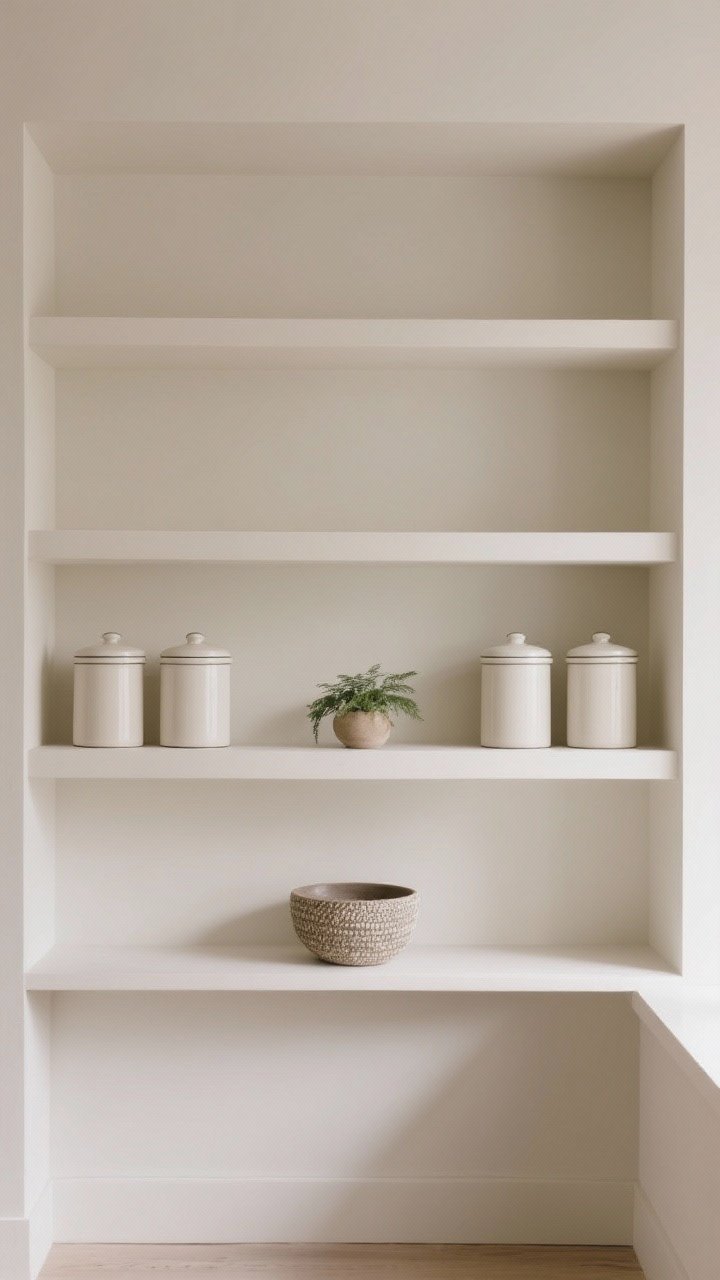
Symmetry calms the eye, especially in a busy kitchen. Try matching canisters on both ends or repeating similar heights. Then break it slightly so it doesn’t feel staged.
Symmetry Tricks
- Mirror the ends: Place similar objects on the far left and right.
- Vary the middle: Use a plant or bowl to soften the symmetry.
- Keep the color consistent: That’s what ties it all together.
16. Use Trays and Risers for Depth
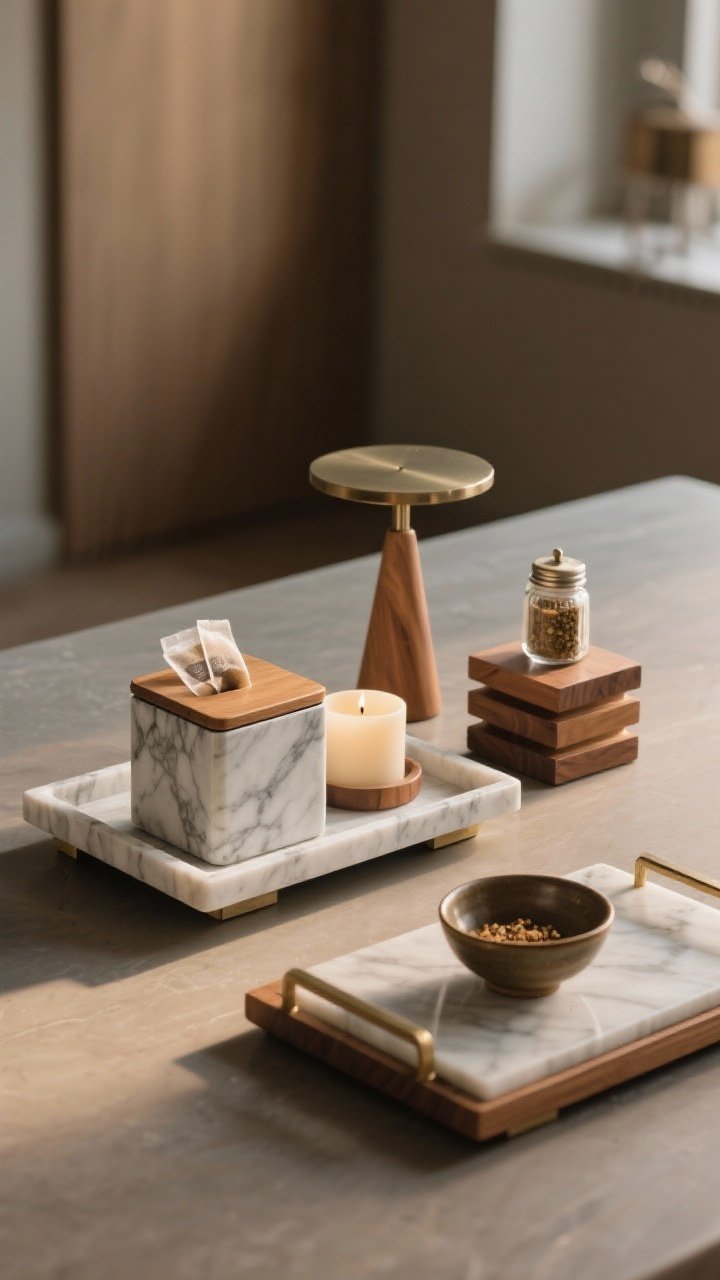
Trays corral chaos. Risers (or a sturdy inverted bowl) create levels so small items don’t get lost. It’s a simple styling cheat that looks designer and keeps crumbs under control.
What to Look For
- Materials that match your vibe: Marble, wood, or metal trays change the mood.
- Different heights: One low tray, one taller riser to build a vignette.
- Hidden function: Use a lidded box on a tray to stash matches, clips, or tea bags.
Bonus Styling Cheats
- Rule of odds: Group items in threes or fives—your eye prefers it.
- Repeat shapes: Echo circles (plates, bowls) or rectangles (boards, books) for rhythm.
- Mind the weight: Heavier-looking items on the lower shelves, lighter up top.
- Add a scent: A small candle or diffuser makes the whole area feel intentional.
Maintenance Made Easy
- Dust weekly: Quick wipe while the kettle boils—done.
- Rotate front items: Helps everything get used and keeps visuals fresh.
- Edit seasonally: If you haven’t touched it in months, reconsider its spot.
Bottom line: your kitchen shelves should work for you and look good doing it. Start with one or two ideas, play with placement, and tweak until it feels right. You’ve got this—and your shelves are about to steal the show.