Classic Cherry Dump Cake – Simple, Sweet, and Crowd-Pleasing
Cherry dump cake is the kind of dessert that makes everyone feel at home. It’s unfussy, quick to assemble, and delivers big flavor with minimal effort. If you’re craving something cozy and nostalgic, this one hits the spot.
You don’t need any special skills—just a few pantry staples and a baking dish. It’s perfect for weeknights, potlucks, or when you just want dessert without a long prep list.
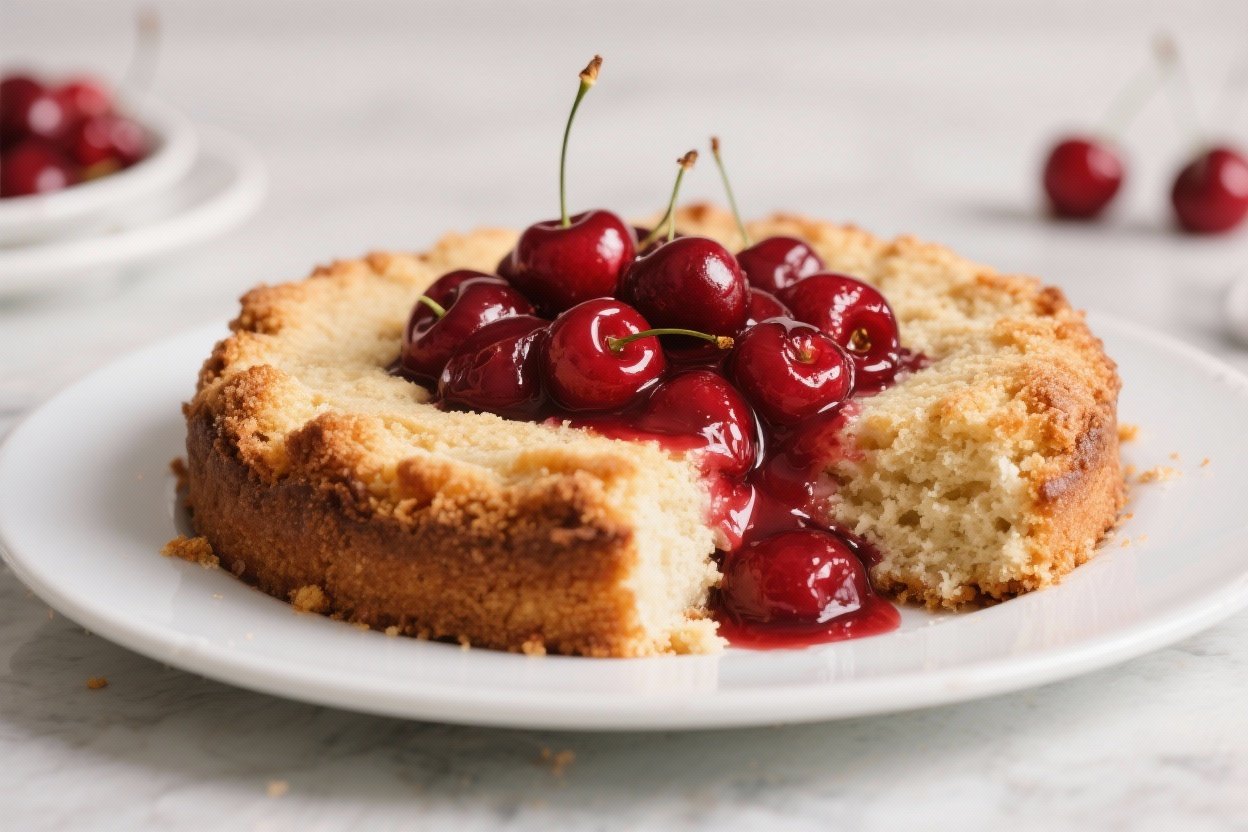
Classic Cherry Dump Cake - Simple, Sweet, and Crowd-Pleasing
Ingredients
Method
- Preheat your oven. Set it to 350°F (175°C).Grease a 9x13-inch baking dish with butter or nonstick spray.
- Layer the cherries. Spread the cherry pie filling evenly in the baking dish. Stir in the vanilla and almond extract right in the pan if using. Add a pinch of salt and mix lightly to distribute.
- Add the dry cake mix. Sprinkle the cake mix evenly over the cherries.Don’t stir. You want a uniform layer so it bakes into a crisp, crumbly topping.
- Pour on the butter. Drizzle the melted butter evenly across the cake mix, covering as much surface area as possible. If there are a few dry patches, that’s okay—they’ll still crisp up.For extra coverage, use 3/4 cup butter.
- Customize (optional). Sprinkle nuts, coconut, or chocolate chips over the top. Nuts add crunch, chocolate adds richness, and coconut adds a toasty sweetness.
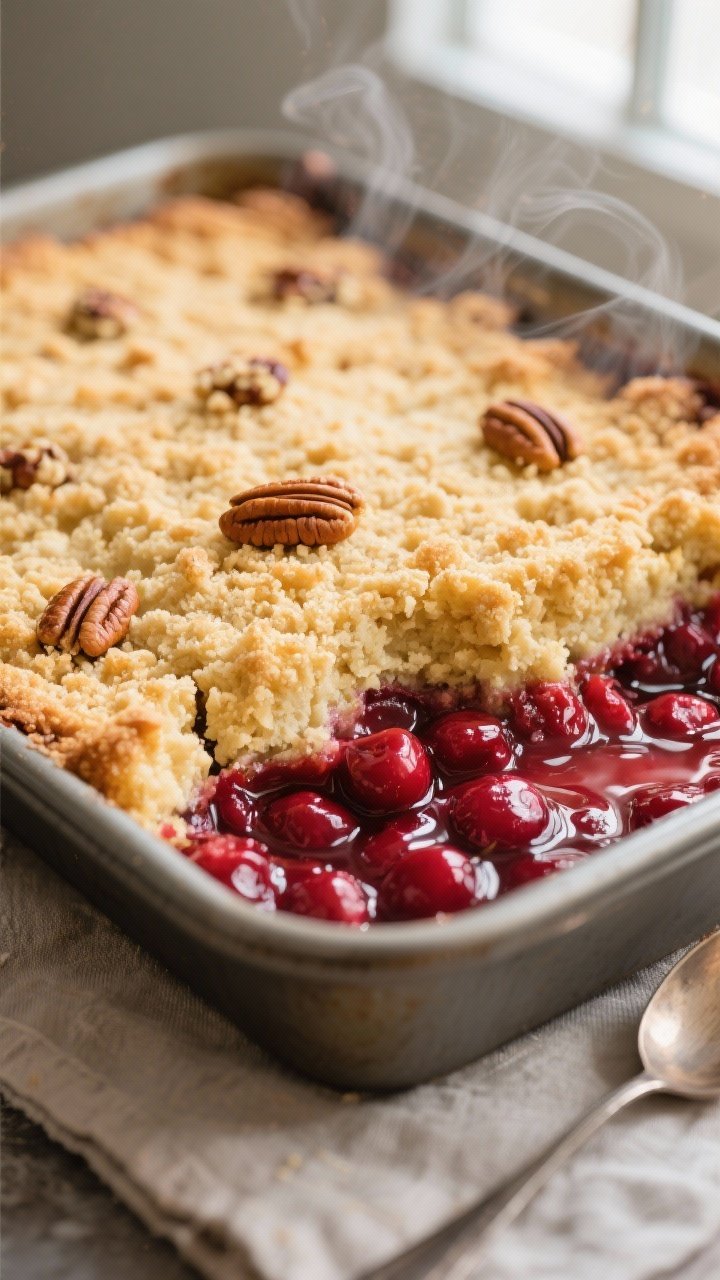
- Bake. Place the dish on the center rack and bake for 40–50 minutes, until the topping is golden brown and the cherry filling is bubbling around the edges.
- Cool slightly. Let it rest for at least 10–15 minutes before serving. This helps the filling set and makes scooping easier.
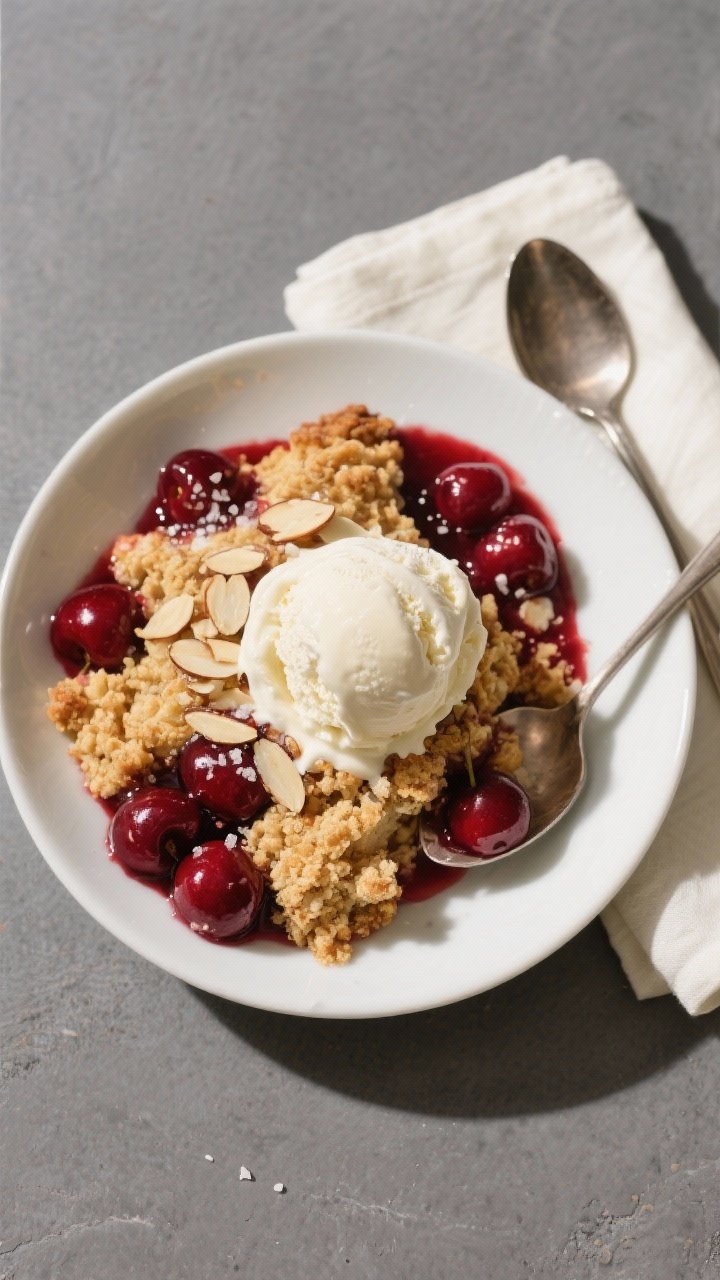
- Serve warm. Spoon into bowls and top with vanilla ice cream or whipped cream.The warm-cold contrast makes this dessert shine.
Why This Recipe Works
This cake is all about smart shortcuts. Using canned cherry pie filling and a boxed cake mix gives you reliable results every time, with a gooey, jammy base and a buttery, golden topping.
The butter melts into the cake mix as it bakes, creating crisp edges and a soft crumble on top. There’s no mixing bowl required, so cleanup is easy. Best of all, the flavors are simple and comforting, and the texture hits that sweet spot between cobbler and cake.
What You’ll Need
- 2 cans (21 ounces each) cherry pie filling
- 1 box (15.25 ounces) yellow cake mix (white or vanilla cake mix also works)
- 1/2 cup (1 stick) unsalted butter, melted (plus a little more if you like extra crisp edges)
- 1 teaspoon vanilla extract (optional, for depth of flavor)
- 1/2 teaspoon almond extract (optional, but fantastic with cherries)
- Pinch of salt (balances the sweetness)
- Optional toppings: chopped pecans or sliced almonds, shredded coconut, or chocolate chips
- To serve: vanilla ice cream or lightly sweetened whipped cream
How to Make It
- Preheat your oven. Set it to 350°F (175°C).Grease a 9×13-inch baking dish with butter or nonstick spray.
- Layer the cherries. Spread the cherry pie filling evenly in the baking dish. Stir in the vanilla and almond extract right in the pan if using. Add a pinch of salt and mix lightly to distribute.
- Add the dry cake mix. Sprinkle the cake mix evenly over the cherries.Don’t stir. You want a uniform layer so it bakes into a crisp, crumbly topping.
- Pour on the butter. Drizzle the melted butter evenly across the cake mix, covering as much surface area as possible. If there are a few dry patches, that’s okay—they’ll still crisp up.For extra coverage, use 3/4 cup butter.
- Customize (optional). Sprinkle nuts, coconut, or chocolate chips over the top. Nuts add crunch, chocolate adds richness, and coconut adds a toasty sweetness.
- Bake. Place the dish on the center rack and bake for 40–50 minutes, until the topping is golden brown and the cherry filling is bubbling around the edges.
- Cool slightly. Let it rest for at least 10–15 minutes before serving. This helps the filling set and makes scooping easier.
- Serve warm. Spoon into bowls and top with vanilla ice cream or whipped cream.The warm-cold contrast makes this dessert shine.
Keeping It Fresh
This cake keeps well for a few days. Cover the baking dish tightly and store it at room temperature for up to 2 days or in the refrigerator for up to 5 days. If you’ve added dairy-based toppings, refrigerate right away.
For reheating, warm individual portions in the microwave for 20–30 seconds, or reheat the whole dish in a 300°F (150°C) oven for 10–15 minutes to revive the crisp top. If freezing, wrap tightly and store for up to 2 months. Thaw in the fridge overnight and reheat in the oven to keep the topping crunchy.
Health Benefits
Cherry dump cake is a treat, but it can still offer a few perks.
Cherries contain antioxidants like anthocyanins, which support heart health and reduce inflammation. If you use nuts, you’ll add healthy fats and a bit of protein for better satiety. You can also make small adjustments to lighten things up: – Use a reduced-sugar cherry pie filling or mix one can of regular with one can of tart cherries in juice. – Choose a lighter cake mix or a mix with fewer additives. – Swap half the butter with unsweetened applesauce for a softer, less rich topping.
These tweaks won’t turn it into health food, but they can nudge the dessert in a lighter direction.
Pitfalls to Watch Out For
– Dry pockets of cake mix: If the butter doesn’t reach all areas, you might get powdery spots. Drizzle butter evenly and consider adding a few spoonfuls of melted butter over any dry-looking areas after 10 minutes of baking. – Soggy topping: Too much liquid or steam can soften the crust. Bake on the center rack and avoid covering the dish while baking. – Overly sweet results: Some pie fillings are very sweet.
Balance with a pinch of salt, a splash of lemon juice, or use a reduced-sugar filling. – Undercooked center: If the top is browning too fast while the center isn’t set, tent loosely with foil and bake an extra 5–10 minutes. – Watery filling: If you use canned cherries instead of pie filling, add sugar and cornstarch to thicken before baking.
Alternatives
– Flavor swaps: Try apple pie filling with spice cake mix, blueberry with lemon cake mix, or peach with yellow or vanilla cake mix. – Chocolate twist: Use chocolate cake mix with cherry pie filling for a Black Forest vibe. Add chocolate chips on top. – Nut-free version: Skip nuts and use coconut or oatmeal for crunch. – Dairy-free: Use a dairy-free cake mix and swap butter for a neutral oil or a vegan butter substitute. Note that oil yields a slightly less crisp top. – From-scratch topping: If you prefer fewer processed ingredients, use 1 cup flour, 1/2 cup sugar, 1 teaspoon baking powder, and a pinch of salt.
Sprinkle over the cherries and drizzle with 1/2 cup melted butter. – Individual servings: Divide ingredients into ramekins for personal desserts. Reduce baking time to 25–30 minutes.
FAQ
Can I use fresh or frozen cherries instead of pie filling?
Yes, but you’ll need to make a quick filling. Combine about 4 cups cherries with 1/2 to 3/4 cup sugar, 2 tablespoons cornstarch, a pinch of salt, and a squeeze of lemon.
Simmer until thick and glossy, then proceed with the recipe.
Do I have to melt the butter first?
Melting helps distribute the fat evenly over the cake mix, which encourages a crisp, golden top. Cold butter sliced into thin pats can work, but it’s harder to cover the surface uniformly.
What if I only have white cake mix?
White cake mix works great. It’s slightly lighter in flavor than yellow cake mix and lets the cherry flavor stand out.
Vanilla cake mix is another good option.
How do I keep the topping extra crunchy?
Use the full 1/2 to 3/4 cup butter and avoid covering the cake while baking. Adding a handful of chopped nuts or a sprinkle of oats can also boost crunch.
Can I prepare it ahead of time?
You can assemble it up to a few hours in advance and keep it in the fridge, then bake right before serving. For best texture, bake close to serving time so the top stays crisp.
Is it gluten-free friendly?
Yes—use a gluten-free yellow or vanilla cake mix.
Most canned cherry pie fillings are gluten-free, but always check labels to be sure.
Why is my cake mix still powdery after baking?
It usually means the butter didn’t cover those areas. Next time, drizzle more evenly or use a bit more butter. You can also lightly mist the top with a little milk or cream before baking to help hydrate dry spots.
Can I reduce the sugar?
Use a reduced-sugar pie filling or make your own cherry filling with less sugar.
You can also choose a lower-sugar cake mix or a from-scratch topping with less sugar.
In Conclusion
Classic cherry dump cake is proof that simple can still be special. With a short ingredient list and almost no prep, you get a warm, bubbly dessert that tastes like comfort in a bowl. Keep it classic, or play with flavors and toppings to make it your own.
Either way, it’s a low-effort, high-reward treat you’ll come back to again and again.