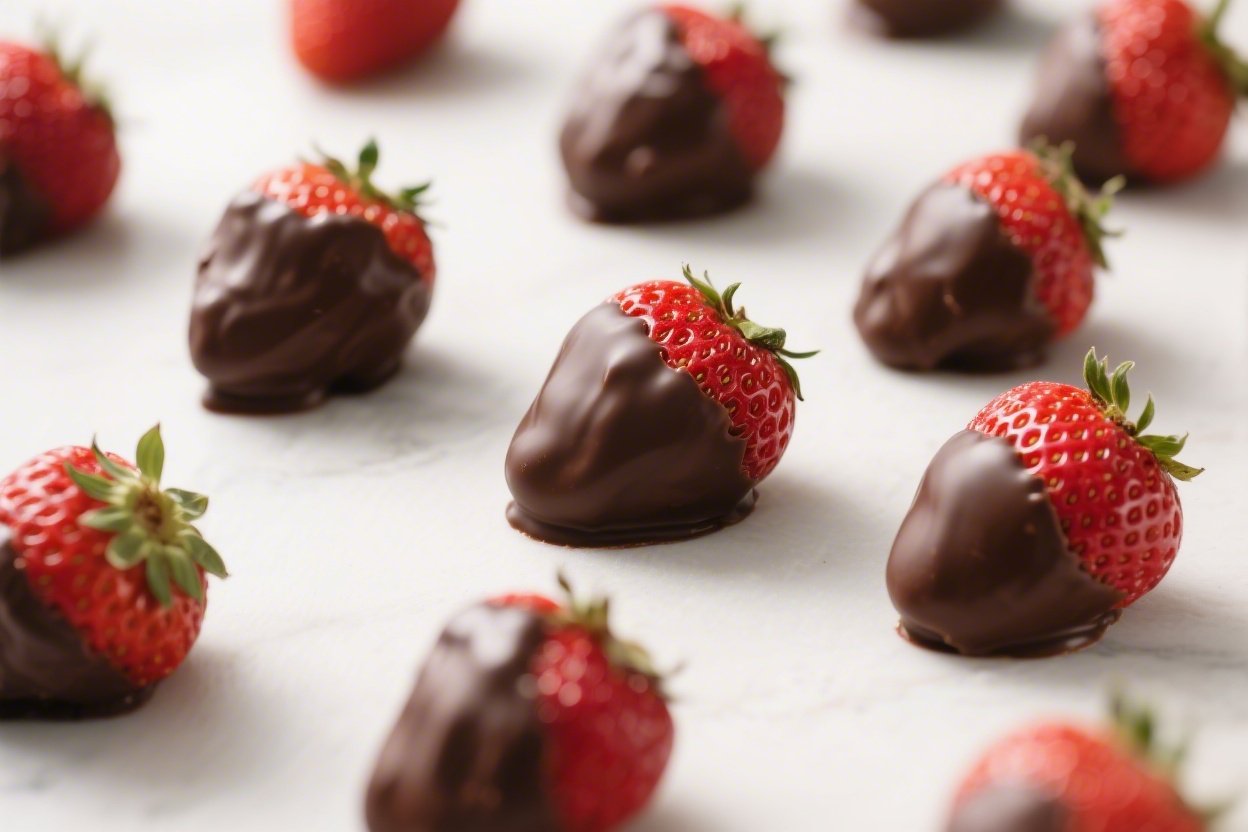
Chocolate-Covered Strawberries – A Simple, Elegant Treat
Chocolate-covered strawberries feel a little fancy without much work. They’re glossy, pretty, and always a hit at parties, date nights, or just when you want something sweet and fresh. The best part is you don’t need special skills or tools to make them.
With a few tips, the chocolate sets smooth and shiny, and the berries stay juicy. Once you make them at home, you’ll wonder why you ever bought them pre-made.
Chocolate-Covered Strawberries - A Simple, Elegant Treat
Ingredients
Method
- Prep the berries. Rinse strawberries under cool water and lay them out on a clean kitchen towel.Pat completely dry. Let them air-dry for at least 15 minutes. Any moisture will stop the chocolate from sticking.
- Line a tray. Set a baking sheet with parchment or wax paper. Clear a spot in your fridge in case your kitchen is warm and you need to chill them briefly to set.
- Chop the chocolate. If you’re using bars, chop them into small, even pieces.Even pieces melt more smoothly and reduce the chance of scorching or lumps.
- Melt the chocolate gently. Use a microwave or double boiler: Microwave method: Place chocolate in a microwave-safe bowl. Heat for 20–30 seconds at a time, stirring in between, until mostly melted. Stir in the last few pieces off-heat to finish melting.If using, add the oil and a pinch of salt.
- Double boiler method: Set a heatproof bowl over a pot with an inch of barely simmering water (the bowl shouldn’t touch the water). Stir until melted and smooth. Add oil and salt if using.
- Optional quick temper for shine. For a glossier, snappier shell, reserve about one-quarter of the chocolate before melting.Melt the rest, then remove from heat and stir in the reserved chocolate until fully melted. This helps bring the temperature down and encourages a shine.
- Test the consistency. The chocolate should flow easily and coat the back of a spoon in a thin layer. If it’s too thick, add a tiny splash (1/2 teaspoon) more oil.If too thin, let it cool a minute and stir.
- Dip the strawberries. Hold each strawberry by the green leaves or skewer it through the top. Dip, swirl, and lift, letting excess chocolate drip back into the bowl. Gently scrape the bottom side on the bowl’s edge to avoid puddles.
- Add toppings quickly. While the chocolate is still wet, sprinkle nuts, coconut, or other toppings over the berries.If drizzling with a second chocolate, wait until the base coat sets slightly, then drizzle with a spoon or piping bag.
- Set on the tray. Place the dipped berries on the lined sheet. Leave space so they don’t touch. Let them sit at room temperature until set, 20–30 minutes in a cool kitchen. If your room is warm, chill for 10–15 minutes only.
- Serve or store. Once set, serve right away for the best texture.If storing, see the tips below to keep them fresh and avoid condensation.
What Makes This Special

Good chocolate and perfectly dry berries are the secret. When chocolate meets moisture, it can seize or turn dull.
So the process here focuses on clean, dry fruit and gentle, even melting. You’ll get a crisp snap from the coating and a burst of sweet-tart strawberry inside. It’s a fast recipe that feels thoughtful, and you can tailor it to any occasion with toppings and chocolate types.
Ingredients
- 1 pound fresh strawberries, stems on, washed and thoroughly dried
- 8 to 10 ounces chocolate (dark, milk, or white), chopped or in chips
- 1 teaspoon neutral oil (optional, for a shinier finish), such as grapeseed or refined coconut oil
- Pinch of fine sea salt (optional, enhances chocolate flavor)
- Optional toppings: finely chopped nuts, shredded coconut, sprinkles, crushed freeze-dried berries, crushed cookies, or a second chocolate for drizzling
- Parchment or wax paper for setting
Step-by-Step Instructions

- Prep the berries. Rinse strawberries under cool water and lay them out on a clean kitchen towel.Pat completely dry. Let them air-dry for at least 15 minutes. Any moisture will stop the chocolate from sticking.
- Line a tray. Set a baking sheet with parchment or wax paper. Clear a spot in your fridge in case your kitchen is warm and you need to chill them briefly to set.
- Chop the chocolate. If you’re using bars, chop them into small, even pieces.Even pieces melt more smoothly and reduce the chance of scorching or lumps.
- Melt the chocolate gently. Use a microwave or double boiler:
- Microwave method: Place chocolate in a microwave-safe bowl. Heat for 20–30 seconds at a time, stirring in between, until mostly melted. Stir in the last few pieces off-heat to finish melting.If using, add the oil and a pinch of salt.
- Double boiler method: Set a heatproof bowl over a pot with an inch of barely simmering water (the bowl shouldn’t touch the water). Stir until melted and smooth. Add oil and salt if using.
- Optional quick temper for shine. For a glossier, snappier shell, reserve about one-quarter of the chocolate before melting.Melt the rest, then remove from heat and stir in the reserved chocolate until fully melted. This helps bring the temperature down and encourages a shine.
- Test the consistency. The chocolate should flow easily and coat the back of a spoon in a thin layer. If it’s too thick, add a tiny splash (1/2 teaspoon) more oil.If too thin, let it cool a minute and stir.
- Dip the strawberries. Hold each strawberry by the green leaves or skewer it through the top. Dip, swirl, and lift, letting excess chocolate drip back into the bowl. Gently scrape the bottom side on the bowl’s edge to avoid puddles.
- Add toppings quickly. While the chocolate is still wet, sprinkle nuts, coconut, or other toppings over the berries.If drizzling with a second chocolate, wait until the base coat sets slightly, then drizzle with a spoon or piping bag.
- Set on the tray. Place the dipped berries on the lined sheet. Leave space so they don’t touch. Let them sit at room temperature until set, 20–30 minutes in a cool kitchen. If your room is warm, chill for 10–15 minutes only.
- Serve or store. Once set, serve right away for the best texture.If storing, see the tips below to keep them fresh and avoid condensation.
How to Store
- Best within 24 hours: Chocolate-covered strawberries are at their peak the day they’re made.
- Room temperature is ideal for the first few hours, if your space is cool and dry. Keep them out of sunlight.
- Short fridge stay: If it’s warm, refrigerate them in a single layer on a parchment-lined tray, loosely covered. Too much cold can cause condensation and dull the chocolate.
- Avoid airtight containers if the berries are still slightly warm; trapped moisture can bead on the chocolate.
- Line with paper towels if storing in a container to catch moisture, and crack the lid for airflow.
Health Benefits
- Strawberries bring vitamin C and fiber. They’re naturally sweet, hydrating, and lower in calories than many desserts.
- Dark chocolate offers antioxidants. Cacao contains flavanols that support heart health when enjoyed in moderation.
- Portion-friendly treat. One or two berries can satisfy a sweet craving without a heavy sugar load, especially when using darker chocolate.
- Simple, real ingredients. You’re in control—no added preservatives or mystery oils.
What Not to Do
- Don’t dip wet berries. Even a little moisture prevents chocolate from adhering and can make the coating streaky.
- Don’t overheat the chocolate. High heat scorches chocolate and ruins the texture.Use gentle, short bursts and stir.
- Don’t refrigerate too long. Prolonged chilling leads to condensation and can make the coating spotty or sticky.
- Don’t use overripe fruit. Mushy or leaky berries make messy, soggy centers. Choose firm, ripe strawberries.
- Don’t skip the lining. Setting them on bare plates can cause sticking and broken shells.
Variations You Can Try
- Chocolate trio: Dip in dark chocolate, then drizzle with milk and white chocolate stripes for contrast.
- Nut crunch: Roll the wet coating in finely chopped pistachios, almonds, or hazelnuts. Add a pinch of flaky sea salt for pop.
- Coconut snow: Sprinkle unsweetened shredded coconut over dark chocolate for a not-too-sweet finish.
- Cookies and cream: Crush chocolate sandwich cookies and press lightly onto the coating.
- Freeze-dried sparkle: Dust with crushed freeze-dried raspberries or strawberries for color and tang.
- Spice note: Stir a pinch of cinnamon or espresso powder into melted chocolate for warmth and depth.
- Dairy-free: Use high-quality dairy-free dark chocolate or vegan chips; add refined coconut oil for shine.
FAQ
Why is my chocolate not sticking to the strawberries?
Moisture is the usual culprit.
Make sure the berries are completely dry, including around the leaves. If needed, dry each one gently with paper towels and let them air-dry longer before dipping.
Can I make them a day ahead?
Yes, but they’re best the same day. If making ahead, store them in a single layer on parchment in the fridge for up to 24 hours.
Let them sit at room temperature for 10–15 minutes before serving to reduce condensation.
What chocolate works best?
Use good-quality chocolate you enjoy eating. Dark chocolate (60–70%) gives a rich, not-too-sweet bite. Milk is creamier and sweeter, and white offers a nice canvas for colors and drizzles.
Couverture chocolate melts and sets especially well.
Do I need to temper the chocolate?
Not strictly, but a quick, simple temper gives a shinier, snappier shell and helps prevent bloom. The “seed” method—stirring unmelted chocolate into melted chocolate—works well for home kitchens.
How do I avoid chocolate “feet” or puddles at the base?
After dipping, lightly scrape the bottom of the berry on the bowl’s edge and hold it upside down for a second to drip off the excess. Place it gently on parchment and don’t move it until set.
Can I use frozen strawberries?
It’s not recommended.
As frozen berries thaw, they release water, which makes chocolate seize and slide off. Fresh, firm berries give the best result.
Why did my chocolate turn dull or streaky?
This usually comes from moisture, overheating, or temperature swings. Keep the workspace dry, melt gently, and avoid long refrigeration.
If you can, let them set at cool room temperature.
What’s the best way to drizzle a second chocolate?
Use a small spoon, a fork, or pour the chocolate into a zip-top bag and snip a tiny corner. Work in quick, steady motions over set berries for clean lines.
How long do they last?
They taste best within 24 hours. After that, the berries can soften and the chocolate may pick up moisture.
If you need to hold them, keep them cool and dry and serve as soon as possible.
Wrapping Up
Chocolate-covered strawberries are simple but feel special every time. With dry fruit, gently melted chocolate, and a few easy tricks, you get a glossy shell and a fresh, juicy center. Customize with toppings or keep them classic—either way, they’re quick to make and hard to resist.
Keep a tray ready for celebrations, gifts, or a sweet moment on a quiet night in.