Red Velvet Crinkle Cookies – Soft, Chewy, and Festive
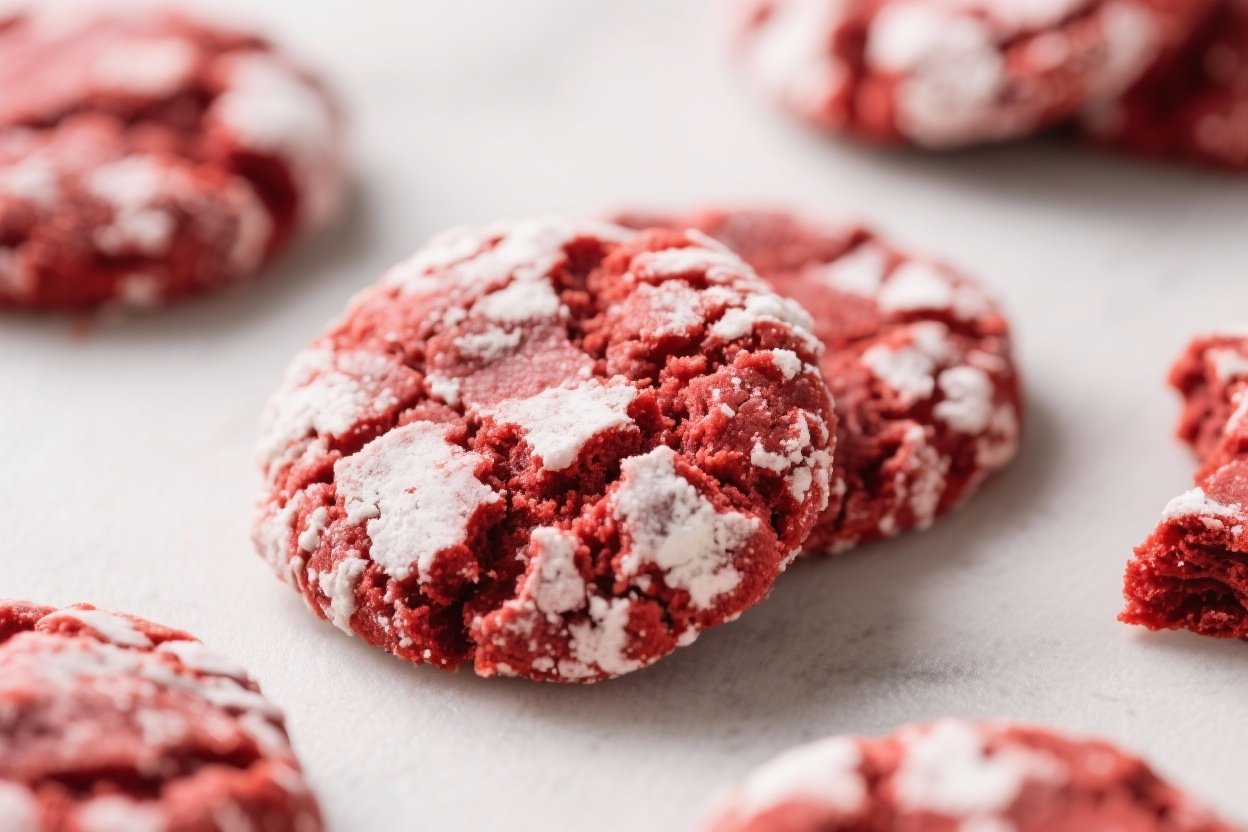
Red Velvet Crinkle Cookies are the kind of treat that makes people smile before they even take a bite. They’re soft and fudgy in the center, lightly crisp on the edges, and coated in a pretty snow-like layer of powdered sugar. The bright red color makes them perfect for holidays, parties, or a just-because baking day.
Best of all, the dough is easy to pull together and bakes quickly. If you like classic chocolate crinkles, this red velvet twist will become a new favorite.
Red Velvet Crinkle Cookies – Soft, Chewy, and Festive
Ingredients
Method
- Preheat and prep: Set the oven to 350°F (175°C).Line two baking sheets with parchment paper.
- Whisk dry ingredients: In a bowl, whisk flour, cocoa powder, baking powder, baking soda, and salt until evenly combined.
- Cream butter and sugars: In a large mixing bowl, beat the softened butter with granulated and brown sugar until light and fluffy, about 2–3 minutes.
- Add eggs and flavorings: Beat in the eggs one at a time. Mix in the vanilla, vinegar, and buttermilk until smooth.
- Color the dough: Add the red food coloring. Start with 1 teaspoon, then add more to achieve a deep red.Mix well so the color is uniform.
- Combine wet and dry: Add the dry ingredients to the wet in two additions. Mix on low just until no dry streaks remain. The dough will be soft and a bit sticky.
- Chill: Cover the bowl and chill the dough for 30–45 minutes.This firms it up for easy rolling and helps keep the cookies thick.
- Prepare the coatings: Add the extra 1/4 cup granulated sugar to one shallow bowl and the powdered sugar to another.
- Portion and roll: Scoop tablespoon-size portions (about 1 heaping tablespoon or 30 g). Roll each into a ball.
- Double coat: Roll each dough ball first in granulated sugar to create a dry surface, then generously in powdered sugar. A thick powdered sugar layer gives the best crinkle effect.
- Bake: Place on prepared sheets, spacing about 2 inches apart.Bake 10–12 minutes, until the tops are crackled and the edges are set. The centers should look slightly soft.
- Cool: Let cookies cool on the sheet for 5 minutes, then transfer to a rack. They’ll firm up as they cool but stay chewy.
What Makes This Special
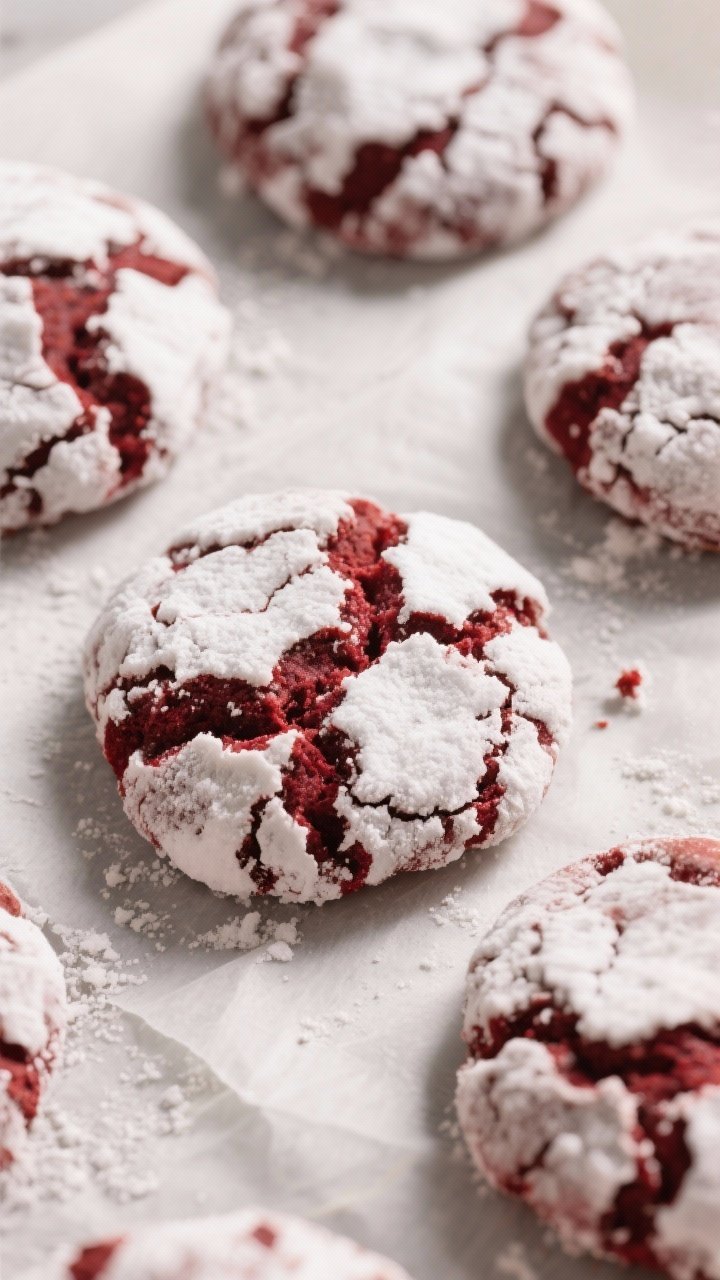
Red velvet has a subtle cocoa flavor and a gentle tang that sets it apart from standard chocolate cookies. In crinkle cookie form, you get that signature crackled top with a soft, brownie-like interior.
The powdered sugar coating doesn’t just look pretty—it balances the cocoa and adds a delicate sweetness. These cookies are also easy to portion, freeze, and bake, making them a great make-ahead option. And unlike some red velvet recipes, this version leans on pantry staples and a simple method.
Ingredients
- 1 3/4 cups (220 g) all-purpose flour
- 1/4 cup (25 g) unsweetened cocoa powder (natural or Dutch-processed)
- 1 teaspoon baking powder
- 1/4 teaspoon baking soda
- 1/2 teaspoon fine salt
- 1/2 cup (115 g) unsalted butter, softened
- 1 cup (200 g) granulated sugar
- 1/4 cup (50 g) packed light brown sugar
- 2 large eggs, at room temperature
- 2 teaspoons vanilla extract
- 1 teaspoon distilled white vinegar (for the classic red velvet tang)
- 2 tablespoons buttermilk (or milk plus 1/2 teaspoon vinegar as a quick swap)
- 1 to 1 1/2 teaspoons liquid red food coloring (gel works too; adjust to your shade)
- 1/2 cup (60 g) powdered sugar (for coating)
- 1/4 cup (50 g) granulated sugar (for coating; helps powdered sugar stick)
Instructions

- Preheat and prep: Set the oven to 350°F (175°C).Line two baking sheets with parchment paper.
- Whisk dry ingredients: In a bowl, whisk flour, cocoa powder, baking powder, baking soda, and salt until evenly combined.
- Cream butter and sugars: In a large mixing bowl, beat the softened butter with granulated and brown sugar until light and fluffy, about 2–3 minutes.
- Add eggs and flavorings: Beat in the eggs one at a time. Mix in the vanilla, vinegar, and buttermilk until smooth.
- Color the dough: Add the red food coloring. Start with 1 teaspoon, then add more to achieve a deep red.Mix well so the color is uniform.
- Combine wet and dry: Add the dry ingredients to the wet in two additions. Mix on low just until no dry streaks remain. The dough will be soft and a bit sticky.
- Chill: Cover the bowl and chill the dough for 30–45 minutes.This firms it up for easy rolling and helps keep the cookies thick.
- Prepare the coatings: Add the extra 1/4 cup granulated sugar to one shallow bowl and the powdered sugar to another.
- Portion and roll: Scoop tablespoon-size portions (about 1 heaping tablespoon or 30 g). Roll each into a ball.
- Double coat: Roll each dough ball first in granulated sugar to create a dry surface, then generously in powdered sugar. A thick powdered sugar layer gives the best crinkle effect.
- Bake: Place on prepared sheets, spacing about 2 inches apart.Bake 10–12 minutes, until the tops are crackled and the edges are set. The centers should look slightly soft.
- Cool: Let cookies cool on the sheet for 5 minutes, then transfer to a rack. They’ll firm up as they cool but stay chewy.
Keeping It Fresh
Store cooled cookies in an airtight container at room temperature for up to 4–5 days.
Slip in a small piece of bread or a slice of apple to maintain moisture, but keep it from touching the cookies. For longer storage, freeze baked cookies for up to 2 months. Thaw at room temperature.
You can also freeze portioned dough balls (uncoated). When ready to bake, thaw just until rollable, coat in sugars, and bake.
Health Benefits
These are treats, so think balance, not health food. That said, there are a few small wins.
Cocoa offers polyphenols, which are antioxidants, and using a mix of granulated and brown sugar helps retain moisture, so you can avoid overbaking and keep portions satisfying. You can also make smart swaps—like using whole wheat pastry flour for up to 1/3 of the flour—without losing tenderness. And because these cookies are rich and flavorful, one or two can scratch the sweet itch.
What Not to Do
- Don’t skip chilling the dough. Warm dough spreads too much and won’t get those bold crinkles.
- Don’t undercoat with powdered sugar. A light dusting melts and disappears.Go for a thick layer.
- Don’t overbake. Pull them when the edges set and the tops crackle. Overbaking dries them out fast.
- Don’t rely on just cocoa for color. Without enough coloring, they’ll look brown rather than red velvet.
- Don’t mix on high after adding flour. Overmixing toughens the cookies.
Variations You Can Try
- Cream cheese core: Freeze small dollops of sweetened cream cheese (cream cheese + powdered sugar + vanilla). Wrap dough around the frozen centers before coating and baking.
- Chocolate chip twist: Fold in 1/2 to 3/4 cup white chocolate or dark chocolate chips for extra texture.
- Peppermint finish: Add 1/4 teaspoon peppermint extract to the dough or sprinkle crushed candy cane on top right after baking.
- Spiced red velvet: Add a pinch of cinnamon or cardamom to the dry mix for warmth.
- Gluten-free swap: Use a 1:1 gluten-free baking flour with xanthan gum.Chill well and avoid overbaking.
- Natural color option: Use beet powder (start with 2–3 teaspoons) plus a touch of gel color if needed. Flavor remains mild.
FAQ
Why do my crinkles sometimes lose the powdered sugar coating?
Moist dough can melt the sugar. Rolling in granulated sugar first creates a barrier that helps the powdered sugar stick and stay visible.
Also, apply a generous coating and bake right away after coating.
Can I make the dough ahead?
Yes. Chill the dough up to 24 hours. If it gets too firm, let it sit at room temperature for 10–15 minutes, then scoop, roll, and coat.
You can also freeze scooped dough balls for later.
What’s the best red food coloring to use?
Gel food coloring gives intense color with less liquid, but liquid color works fine. Start small and build up to your desired shade. For a natural route, beet powder deepens the red but may be less vibrant.
How do I know when they’re done?
Look for cracked tops and edges that are set, with the centers still soft and slightly puffy.
They’ll continue to set on the baking sheet as they cool.
Can I reduce the sugar?
You can trim 2–3 tablespoons from the dough without much texture change. Keep the coating sugars as is for the crinkle effect. Reducing too much can make them dry and dull in flavor.
Do I need vinegar and buttermilk?
They add the classic red velvet tang and help with lift and tenderness.
If you don’t have buttermilk, use milk with a squeeze of vinegar or lemon juice. The vinegar is small but worth keeping for flavor and texture.
Why chill the dough?
Chilling firms the butter, controls spread, and intensifies the crinkle pattern. It also makes the dough easier to roll and coat cleanly.
In Conclusion
Red Velvet Crinkle Cookies bring together the best parts of red velvet and classic crinkles: a rich cocoa note, a hint of tang, and a snowy, crackled finish.
They’re easy to make, bake quickly, and look instantly festive on any cookie platter. With a reliable base recipe and plenty of variations to explore, you’ll have a show-stopping cookie you can count on for holidays and everyday cravings alike.