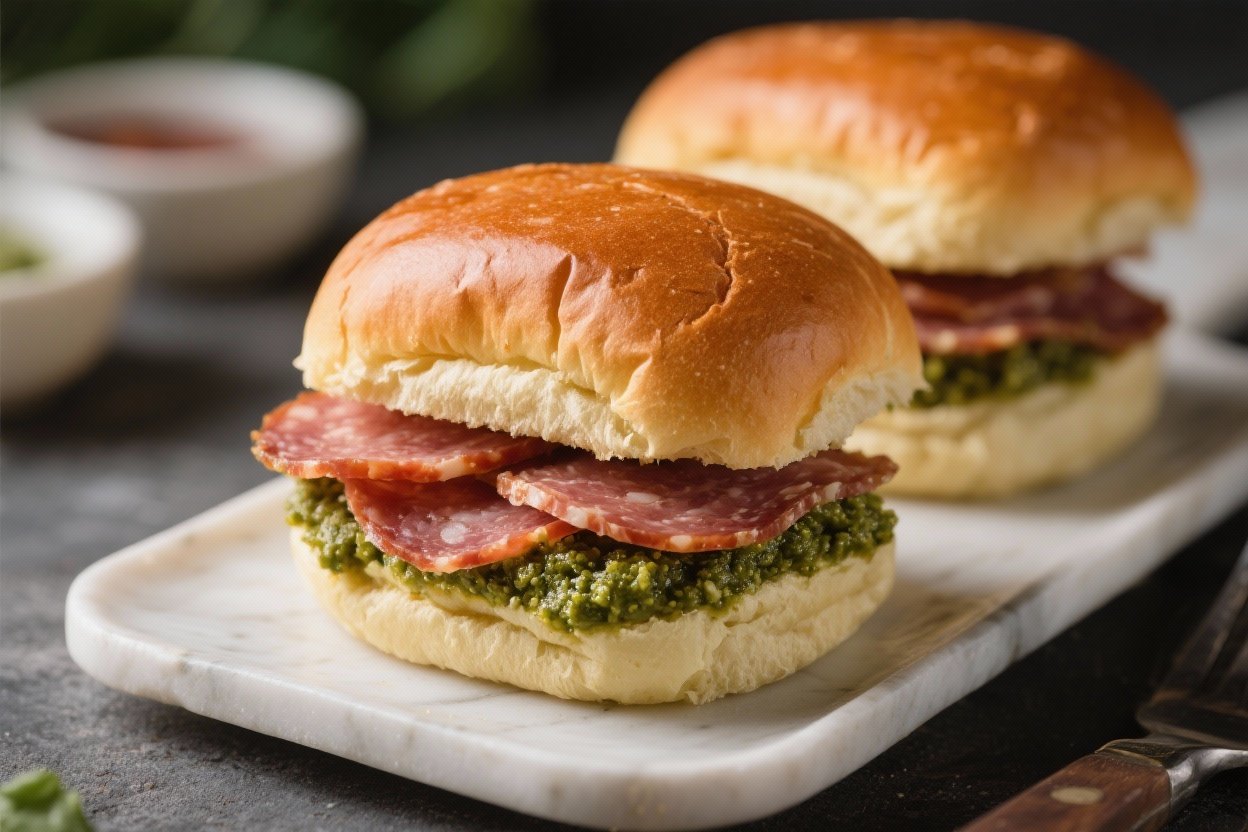
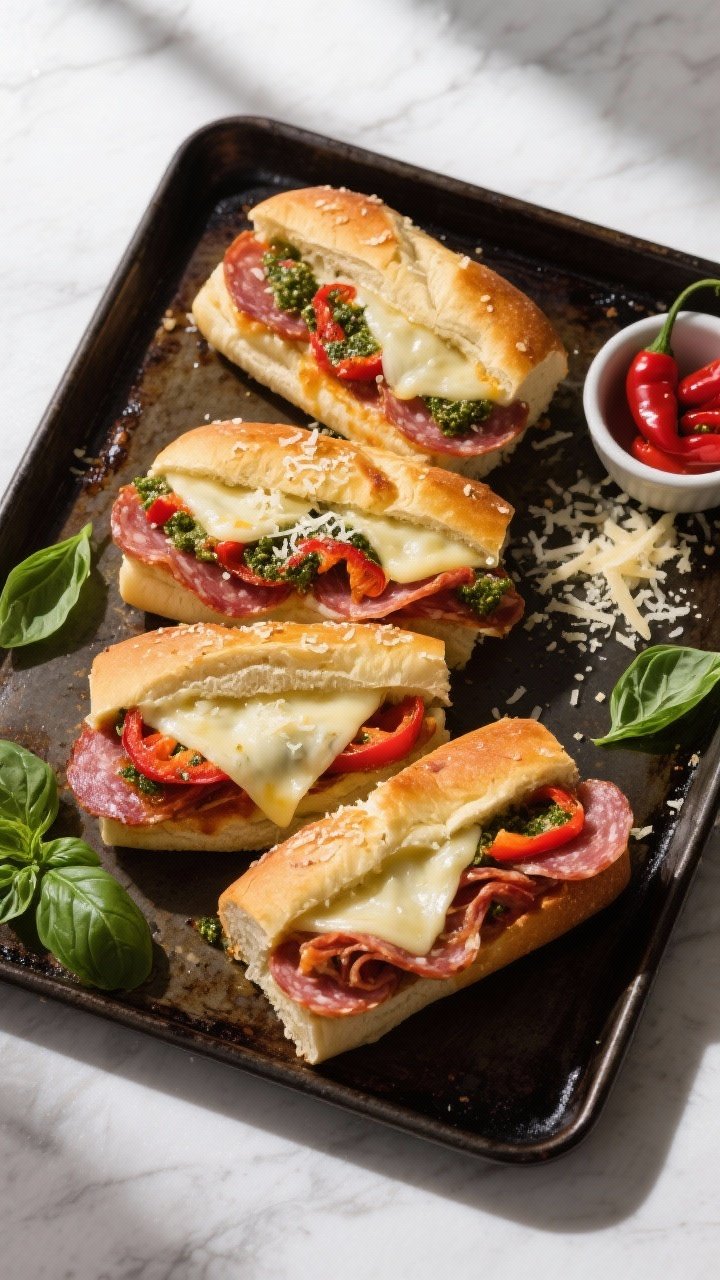
Italian Sliders With Salami & Pesto – Small Sandwiches, Big Flavor
These Italian sliders are the kind of crowd-pleasing snack you’ll make once and keep coming back to. They’re stacked with garlicky pesto, melty cheese, tangy peppers, and plenty of salami on soft slider rolls. You get all the flavors of an Italian sub, but in a warm, pull-apart party tray.
They’re quick to assemble, easy to bake, and great for game day, potlucks, or a family dinner. If you love bold, savory flavors in a simple package, these sliders won’t disappoint.
Italian Sliders With Salami & Pesto – Small Sandwiches, Big Flavor
Ingredients
Method
- Prep the pan: Heat oven to 350°F (175°C).Line a 9x13-inch baking dish with parchment or lightly grease it. This makes pulling them out clean and easy.
- Slice the rolls: Without separating the rolls, slice the whole sheet horizontally to create a top and bottom slab. Place the bottom half in the baking dish.
- Spread the pesto: Brush or spread pesto evenly over the bottom slab.Leave a small border so it doesn’t ooze out too much during baking.
- Layer the cheese: Add a layer of provolone slices, slightly overlapping, to cover the entire surface. This helps seal in moisture and keeps the bread from getting soggy.
- Add the salami: Shingle the salami slices generously across the cheese. Aim for full coverage so every bite has plenty of flavor.
- Add the extras: Scatter roasted red peppers, onion slices, and pepperoncini if using.Season lightly with black pepper. Tuck in a few fresh basil leaves for extra freshness.
- Top with more cheese: Add a final layer of provolone to create that gooey pull when you slice the sliders.
- Close it up: Place the top half of the rolls on. Press down gently to help everything settle.
- Make the butter topping: Stir melted butter with grated Parmesan, Italian seasoning, and garlic.Brush this mixture over the tops of the rolls. Don’t skip this step—it adds flavor and a beautiful golden finish.
- Bake: Cover loosely with foil and bake for 12–15 minutes, until the cheese is melted. Remove foil and bake another 5–7 minutes to brown the tops.
- Rest and slice: Let stand 5 minutes, then slice along the roll lines with a serrated knife. Serve warm.
What Makes This Special
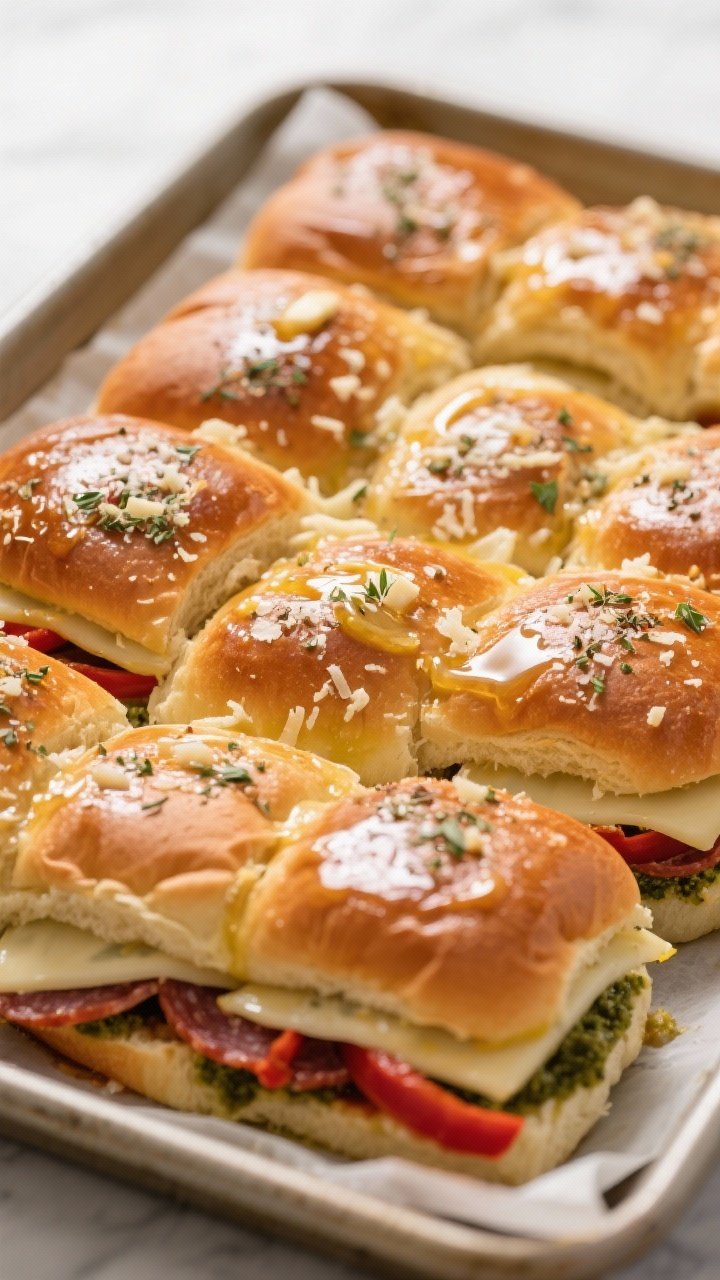
These sliders deliver classic Italian deli vibes with minimal effort. The combination of salami, pesto, provolone, and roasted red peppers hits every note—salty, herby, creamy, and a touch sweet.
Baking the sliders transforms the rolls into a buttery, toasted crust while the cheese gets perfectly melty. They’re also easy to customize with what you have on hand. Best of all, you can assemble them ahead and bake right before serving.
Ingredients
- 1 package (12-count) soft slider rolls or Hawaiian rolls
- 1/2 cup basil pesto (store-bought or homemade)
- 10–12 ounces sliced Genoa salami (or a mix of salami and pepperoni)
- 8 ounces provolone cheese, sliced
- 1 cup roasted red peppers, drained and patted dry, sliced into strips
- 1/2 small red onion, very thinly sliced (optional)
- 2 tablespoons sliced pepperoncini or banana peppers (optional for heat)
- 3 tablespoons unsalted butter, melted
- 1 tablespoon grated Parmesan
- 1 teaspoon Italian seasoning
- 1 clove garlic, finely minced (or 1/4 teaspoon garlic powder)
- Fresh basil leaves (optional, for layering)
- Salt and black pepper, to taste
How to Make It
- Prep the pan: Heat oven to 350°F (175°C).Line a 9×13-inch baking dish with parchment or lightly grease it. This makes pulling them out clean and easy.
- Slice the rolls: Without separating the rolls, slice the whole sheet horizontally to create a top and bottom slab. Place the bottom half in the baking dish.
- Spread the pesto: Brush or spread pesto evenly over the bottom slab.Leave a small border so it doesn’t ooze out too much during baking.
- Layer the cheese: Add a layer of provolone slices, slightly overlapping, to cover the entire surface. This helps seal in moisture and keeps the bread from getting soggy.
- Add the salami: Shingle the salami slices generously across the cheese. Aim for full coverage so every bite has plenty of flavor.
- Add the extras: Scatter roasted red peppers, onion slices, and pepperoncini if using.Season lightly with black pepper. Tuck in a few fresh basil leaves for extra freshness.
- Top with more cheese: Add a final layer of provolone to create that gooey pull when you slice the sliders.
- Close it up: Place the top half of the rolls on. Press down gently to help everything settle.
- Make the butter topping: Stir melted butter with grated Parmesan, Italian seasoning, and garlic.Brush this mixture over the tops of the rolls. Don’t skip this step—it adds flavor and a beautiful golden finish.
- Bake: Cover loosely with foil and bake for 12–15 minutes, until the cheese is melted. Remove foil and bake another 5–7 minutes to brown the tops.
- Rest and slice: Let stand 5 minutes, then slice along the roll lines with a serrated knife. Serve warm.
Keeping It Fresh
These sliders are best right out of the oven, but you can store leftovers in an airtight container in the fridge for up to 3 days.
Reheat in a 325°F (165°C) oven for 10–12 minutes to re-crisp the tops and melt the cheese again. Avoid microwaving if possible—it softens the bread. If you plan to make them ahead, assemble the sliders without the butter topping, cover, and chill for up to 24 hours.
Brush with butter just before baking.
Health Benefits
- Protein and calcium: Salami and provolone offer protein and calcium, which support muscle function and bone health.
- Healthy fats from pesto: Pesto made with olive oil and nuts provides heart-friendly monounsaturated fats.
- Vegetable boost: Roasted red peppers add vitamin C, while onions and pepperoncini bring antioxidants and fiber.
- Portion control built in: Slider size helps with mindful serving—one or two can be satisfying without overdoing it.
For a lighter spin, choose turkey or chicken salami, use part-skim provolone, and go a little heavier on the veggies. You still get big flavor with a bit less sodium and saturated fat.
Pitfalls to Watch Out For
- Soggy bottoms: Pat roasted peppers dry and layer cheese under and over the fillings to create a moisture barrier.
- Oversalting: Salami, cheese, pesto, and Parmesan are already salty. Taste as you go and skip adding extra salt unless needed.
- Burnt tops:</-strong> Cover with foil for the first part of baking, then uncover to brown.Keep an eye on them in the last few minutes.
- Uneven slicing: Let sliders rest briefly after baking, then use a serrated knife to cut along the seams.
Recipe Variations
- Caprese Sliders: Swap salami for sliced fresh mozzarella and tomatoes. Add pesto and a drizzle of balsamic glaze after baking.
- Spicy Calabrian: Use spicy salami, add chopped Calabrian chiles, and finish with a sprinkle of crushed red pepper.
- Muffuletta-Inspired: Replace pesto with olive salad spread, and use a mix of salami, mortadella, and ham with provolone.
- Veggie Lover’s: Skip the meat and layer pesto with roasted zucchini, artichoke hearts, spinach, and provolone.
- Pesto Chicken: Use thinly sliced rotisserie chicken with pesto and mozzarella. Add sun-dried tomatoes for tang.
- Gluten-Free: Use gluten-free rolls and check labels on pesto and salami to ensure they’re certified gluten-free.
FAQ
Can I use a different cheese?
Yes.
Provolone melts smoothly and tastes classic, but mozzarella, fontina, or even Swiss will work. Choose a cheese that melts well and isn’t too sharp.
What kind of salami is best?
Genoa salami is mild and reliable. For more spice, try soppressata or a mix of Genoa and pepperoni.
Thin slices layer better and melt into the cheese.
Can I make these ahead?
Definitely. Assemble up to a day in advance without the butter topping, cover tightly, and refrigerate. Brush with butter and bake right before serving.
How do I prevent soggy sliders?
Dry your peppers, layer cheese on the bottom and top, and don’t overdo the pesto.
Bake uncovered at the end to evaporate extra moisture and crisp the tops.
What can I serve with them?
They go great with a simple green salad, Caesar salad, tomato soup, or a tray of marinated olives and pickled veggies. Chips work for a casual spread.
Can I freeze the sliders?
You can freeze after baking and cooling, but the texture is best fresh. If freezing, wrap tightly and reheat in the oven from thawed for the best results.
Is there a nut-free pesto option?
Yes.
Many store-bought pestos are nut-free, or you can make your own with basil, olive oil, Parmesan, garlic, and lemon—no nuts required.
How many sliders per person?
As an appetizer, plan on 1–2 per person. As a main, 2–3 usually does the trick, especially with a side.
In Conclusion
Italian Sliders with Salami & Pesto bring full-on deli flavor in a simple, shareable format. They’re fast to assemble, easy to bake, and endlessly customizable.
Keep the cheese barrier trick in mind, brush on that seasoned butter, and you’ll have golden, melty sliders that disappear in minutes. Whether it’s game day or Tuesday night, this recipe is a sure win.