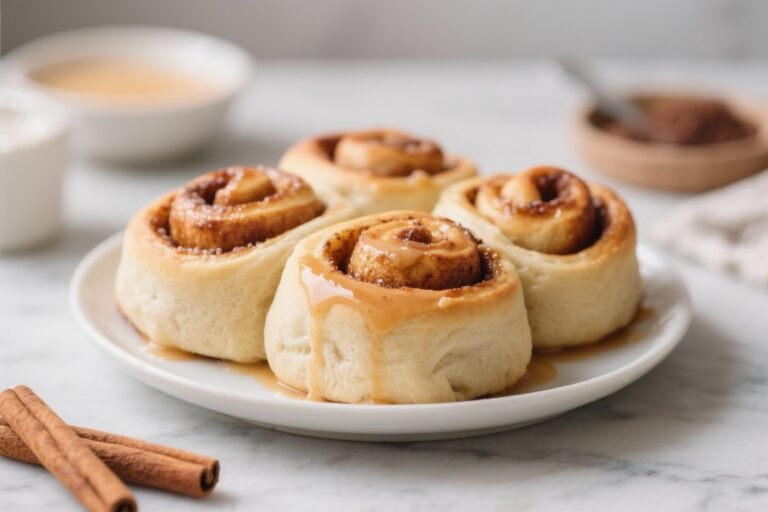
Classic Cream Cheese Icing for Cinnamon Buns – Smooth, Tangy, and Perfectly Sweet
Warm cinnamon buns deserve a frosting that melts into every swirl and adds just the right lift of sweetness. This classic cream cheese icing does exactly that. It’s silky, tangy, and easy to whip up with pantry staples.
Whether you like it thick and spreadable or soft and drippy, you can adjust it in minutes. Make a batch while your buns bake, and you’ll be ready to swipe on a glossy finish the moment they come out of the oven.

Classic Cream Cheese Icing for Cinnamon Buns - Smooth, Tangy, and Perfectly Sweet
Ingredients
- Cream cheese: 4 ounces (half a standard block), softened to room temperature. Use full-fat for the best texture.
- Unsalted butter: 3 tablespoons, softened.Adds richness and a smooth finish.
- Powdered sugar: 1 to 1 1/4 cups, sifted. Adjust to taste and desired consistency.
- Vanilla extract: 1 teaspoon for warmth and depth.
- Pinch of fine salt: Brightens the flavors and cuts the sweetness.
- Milk or heavy cream (optional): 1–2 tablespoons if you want a pourable glaze.
- Fresh lemon juice (optional): 1/2 teaspoon for a light tangy lift.
Instructions
- Soften your base: Make sure the cream cheese and butter are truly at room temperature. They should press easily with a finger but not feel greasy.
- Beat until smooth: In a medium bowl, beat the cream cheese and butter with a hand mixer on medium speed until creamy and lump-free, about 1–2 minutes.
- Add flavor: Mix in the vanilla and a pinch of salt.If using lemon juice, add it here.
- Sweeten gradually: Add the powdered sugar in two additions, beating on low at first to avoid a sugar cloud, then increasing to medium until smooth and fluffy.
- Adjust consistency: For a thicker, spreadable icing, stop here. For a glaze that melts into the buns, beat in milk or cream 1 teaspoon at a time until it flows slowly off a spoon.
- Finish and use: Taste and tweak sweetness or salt as needed. Spread over warm (not hot) cinnamon buns so the icing softens and settles into the spirals.
What Makes This Recipe So Good

- Perfect texture: Smooth and creamy with enough body to cling to warm buns without sliding off.
- Balanced flavor: The tang of cream cheese keeps the icing from being cloyingly sweet.
- Quick to make: Comes together in one bowl in about 5 minutes.
- Customizable: Easy to adjust thickness and sweetness, plus flavor add-ins if you want a twist.
- Make-ahead friendly: Stores well and re-whips beautifully.
What You’ll Need
- Cream cheese: 4 ounces (half a standard block), softened to room temperature. Use full-fat for the best texture.
- Unsalted butter: 3 tablespoons, softened.
Adds richness and a smooth finish.
- Powdered sugar: 1 to 1 1/4 cups, sifted. Adjust to taste and desired consistency.
- Vanilla extract: 1 teaspoon for warmth and depth.
- Pinch of fine salt: Brightens the flavors and cuts the sweetness.
- Milk or heavy cream (optional): 1–2 tablespoons if you want a pourable glaze.
- Fresh lemon juice (optional): 1/2 teaspoon for a light tangy lift.
How to Make It

- Soften your base: Make sure the cream cheese and butter are truly at room temperature. They should press easily with a finger but not feel greasy.
- Beat until smooth: In a medium bowl, beat the cream cheese and butter with a hand mixer on medium speed until creamy and lump-free, about 1–2 minutes.
- Add flavor: Mix in the vanilla and a pinch of salt.
If using lemon juice, add it here.
- Sweeten gradually: Add the powdered sugar in two additions, beating on low at first to avoid a sugar cloud, then increasing to medium until smooth and fluffy.
- Adjust consistency: For a thicker, spreadable icing, stop here. For a glaze that melts into the buns, beat in milk or cream 1 teaspoon at a time until it flows slowly off a spoon.
- Finish and use: Taste and tweak sweetness or salt as needed. Spread over warm (not hot) cinnamon buns so the icing softens and settles into the spirals.
How to Store
- Short-term: Keep in an airtight container in the fridge for up to 5 days.
- Freeze: Store up to 2 months.
Thaw overnight in the fridge, then re-whip to restore creaminess.
- Re-warm: Let refrigerated icing sit at room temperature for 20–30 minutes, then stir or beat briefly before using.
- Food safety note: Because it contains dairy, avoid leaving iced buns at room temperature for more than 2 hours.
Why This is Good for You
- Controlled sweetness: You decide how much sugar to use, which can help keep the overall dessert from being overly sweet.
- Real ingredients: Full-fat cream cheese and butter provide satisfying richness, helping smaller portions feel more indulgent.
- Flavor balance: The tang from cream cheese and a pinch of salt enhances flavor, so you can use less icing and still feel satisfied.
- No confusing additives: Simple, familiar ingredients you likely already have on hand.
Common Mistakes to Avoid
- Using cold cream cheese: This leads to lumps that never fully smooth out. Soften it first.
- Over-thinning: A splash too much milk can make the icing run off your buns. Add liquid slowly.
- Skipping the sift: Powdered sugar clumps easily.
Sifting helps you get that silky finish.
- Frosting hot buns: If they’re too hot, the icing will melt into a puddle. Aim for warm to the touch.
- Overmixing after adding liquid: Vigorous beating can make it too airy and loose. Mix just until smooth.
Variations You Can Try
- Maple cream cheese icing: Replace half the vanilla with pure maple syrup and reduce powdered sugar by 2 tablespoons.
- Brown butter twist: Brown the butter, cool until soft, then proceed.
Expect a toasty, nutty flavor.
- Vanilla bean: Swap the extract for seeds from half a vanilla bean for a speckled, fragrant icing.
- Citrus zest: Add 1/2 teaspoon orange or lemon zest to brighten the cinnamon buns.
- Spiced version: Whisk in a pinch of cinnamon or cardamom for a cozy, bakery-style finish.
- Extra tangy: Add 1–2 teaspoons sour cream to amplify tang and silkiness.
- Lighter option: Use Neufchâtel instead of full-fat cream cheese. Texture will be slightly softer.
FAQ
Can I make this without a mixer?
Yes. Use a sturdy spatula or whisk and a bowl.
Mash the softened cream cheese and butter together until very smooth, then stir in the remaining ingredients. It takes a little more elbow grease but works fine.
How do I fix icing that’s too runny?
Add more sifted powdered sugar, 1 tablespoon at a time, and beat gently until it thickens. A brief chill in the fridge (5–10 minutes) also helps firm it up.
What if my icing is lumpy?
It’s usually from cold cream cheese.
Let the bowl sit at room temperature for 10–15 minutes, then beat again. If needed, press the icing through a fine mesh sieve to smooth it out.
Is salted butter okay?
Yes, but reduce or skip the added salt. Taste as you go so the icing doesn’t end up overly salty.
Can I make it ahead for a brunch?
Absolutely.
Prepare it up to 2 days ahead, refrigerate, then bring it to room temp and re-whip before serving. Add a teaspoon of milk if it seems too stiff.
How much icing does this make?
Enough for about 8–10 standard cinnamon buns, depending on how generously you frost. Double the recipe for a large pan or extra-drippy coverage.
Can I use this on other baked goods?
Yes.
It’s great on carrot cake, pumpkin bread, banana cake, cinnamon rolls, and even as a dip for apple slices.
Wrapping Up
A good cream cheese icing turns homemade cinnamon buns into something bakery-worthy. This version is simple, reliable, and easy to tweak for the exact texture you like. Keep the ingredients soft, add sugar gradually, and frost while the buns are warm.
Once you nail this base recipe, you can spin it any way you want—maple, citrus, or spiced—and it will still taste like home.