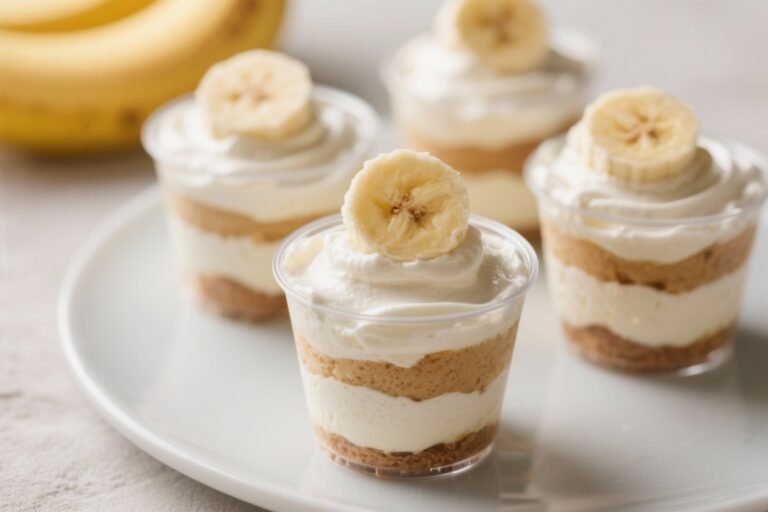
No-Bake Peanut Butter Cheesecake in a Cup – Creamy, Easy, and Ready Fast
No oven, no fuss—just creamy peanut butter bliss layered in a cup. This no-bake cheesecake hits that sweet spot between rich and light, with a smooth filling and a crunchy cookie base. It’s quick to make, easy to customize, and perfect for when you want dessert without turning on the oven.
Make a single serving or a tray of cups for a party. They’re cute, delicious, and surprisingly simple.

No-Bake Peanut Butter Cheesecake in a Cup – Creamy, Easy, and Ready Fast
Ingredients
Method
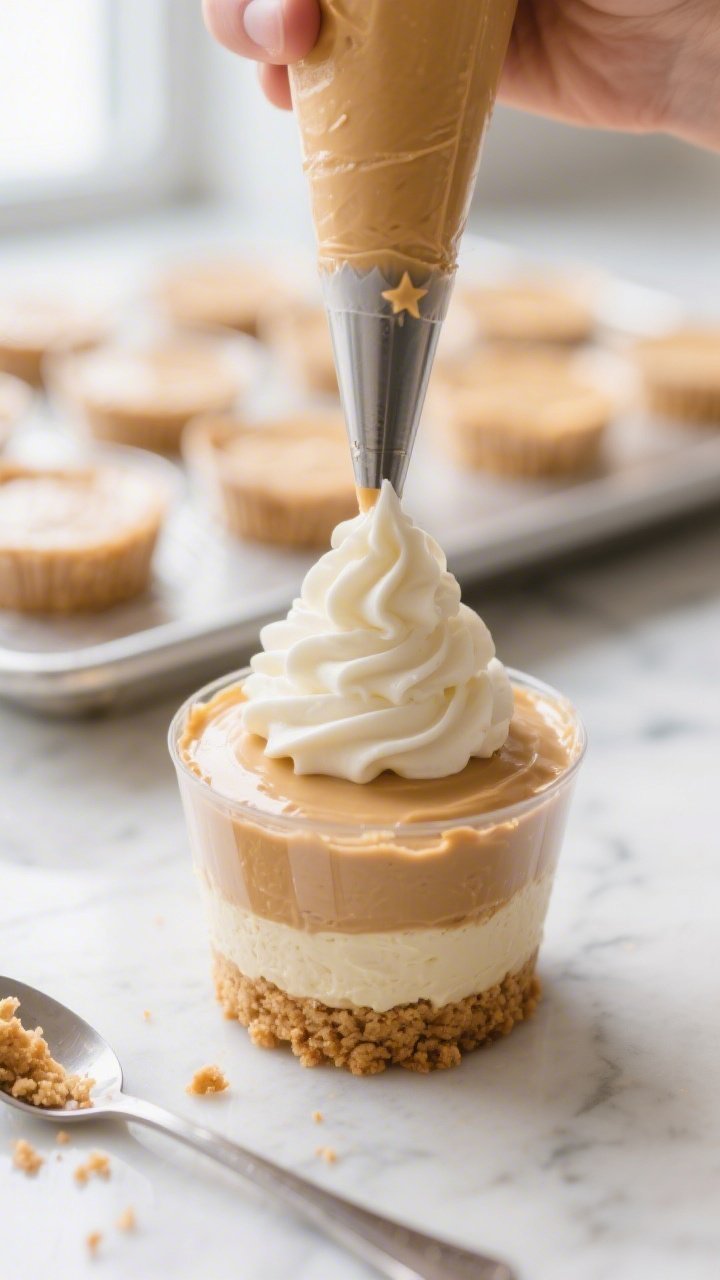
- Make the crumb base: Crush 10–12 graham crackers (about 1 1/2 cups crumbs). Stir in 4 tablespoons melted butter and a pinch of salt until the crumbs feel like wet sand.
- Portion the base: Spoon 2–3 tablespoons of the crumbs into each cup.Press down with the back of a spoon or the bottom of a smaller glass to compact. Chill while you make the filling.
- Soften the cream cheese: Let 8 oz cream cheese sit at room temperature until very soft. This helps it blend smooth without lumps.
- Beat the filling base: In a bowl, beat the softened cream cheese with 1/2 cup creamy peanut butter until smooth and uniform.Add 1/2 cup powdered sugar, 1 teaspoon vanilla, and a tiny pinch of salt. Beat again until fluffy.
- Whip the cream: In a separate cold bowl, whip 3/4 cup heavy cream to medium-stiff peaks. If using whipped topping, measure about 1 1/2 cups.
- Fold gently: Add one-third of the whipped cream to the peanut mixture and fold to loosen it.Fold in the rest in two additions until no streaks remain. Don’t overmix.
- Fill the cups: Spoon or pipe the cheesecake filling over the chilled crumb bases, leaving a little room on top for garnish.
- Chill to set: Cover and refrigerate for at least 2 hours, or up to 24 hours. The flavor deepens as it chills.
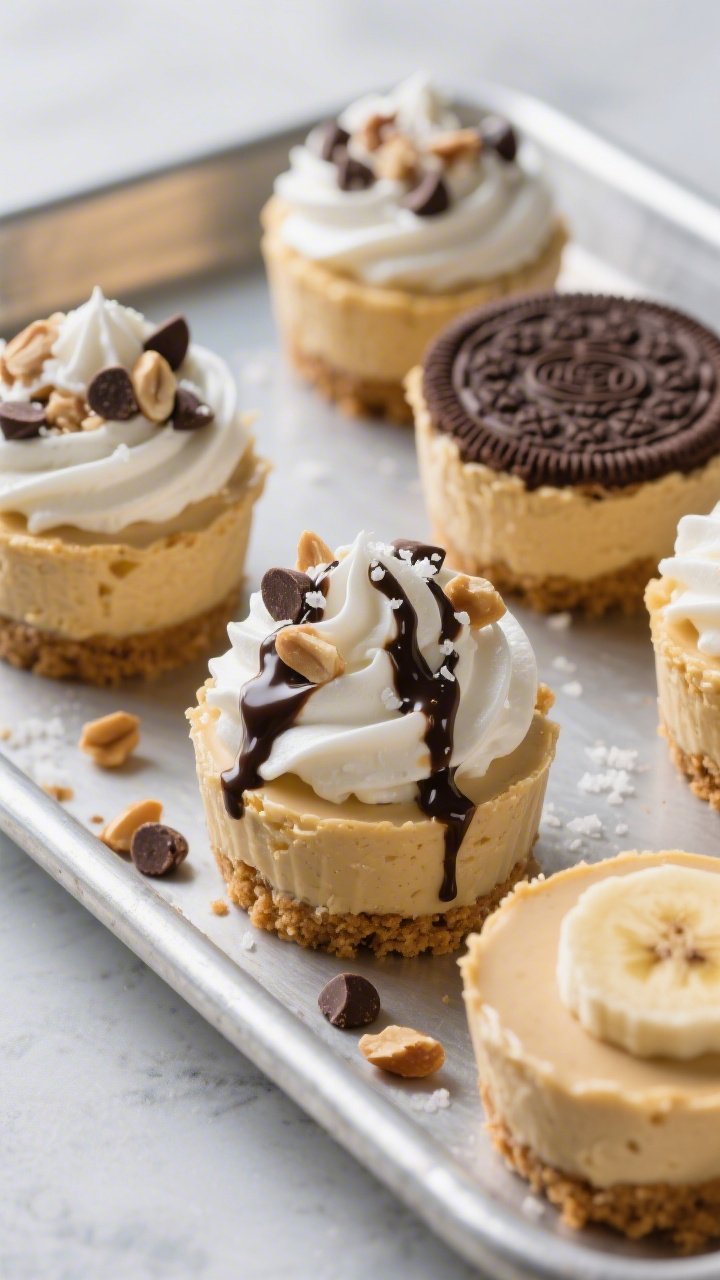
- Garnish and serve: Top with a swirl of whipped cream, a drizzle of chocolate or caramel, and a sprinkle of chopped peanuts or mini chips.Add a small pinch of flaky sea salt if you like sweet-salty contrast.
Why This Recipe Works
This recipe leans on a few smart tricks to deliver big flavor with little effort.
- Fast set, no bake: The cream cheese, peanut butter, and whipped cream create structure without eggs or heat.
- Balanced sweetness: A touch of powdered sugar makes the filling sweet but not cloying, letting the peanut flavor shine.
- Rich but airy texture: Folding in whipped cream keeps the cheesecake light, not heavy.
- Crunchy contrast: A buttery cookie crumb base adds texture and holds up well in the fridge.
- Built-in portion control: Serving in cups makes it easy to scale, serve, and store.
Shopping List
- Cream cheese (8 oz block, full-fat, softened)
- Creamy peanut butter (not natural drippy style)
- Powdered sugar (also called confectioners’ sugar)
- Vanilla extract
- Heavy whipping cream (or store-bought whipped topping)
- Graham crackers (or digestive biscuits, or chocolate cookies)
- Unsalted butter (melted)
- Fine salt (a pinch to balance sweetness)
- Optional toppings: mini chocolate chips, chopped peanuts, caramel or chocolate sauce, sea salt flakes, banana slices
- Serving cups: 6–8 small jars, tumblers, or clear plastic dessert cups (6–8 oz each)
Step-by-Step Instructions
- Make the crumb base: Crush 10–12 graham crackers (about 1 1/2 cups crumbs). Stir in 4 tablespoons melted butter and a pinch of salt until the crumbs feel like wet sand.
- Portion the base: Spoon 2–3 tablespoons of the crumbs into each cup.Press down with the back of a spoon or the bottom of a smaller glass to compact. Chill while you make the filling.
- Soften the cream cheese: Let 8 oz cream cheese sit at room temperature until very soft. This helps it blend smooth without lumps.
- Beat the filling base: In a bowl, beat the softened cream cheese with 1/2 cup creamy peanut butter until smooth and uniform.Add 1/2 cup powdered sugar, 1 teaspoon vanilla, and a tiny pinch of salt. Beat again until fluffy.
- Whip the cream: In a separate cold bowl, whip 3/4 cup heavy cream to medium-stiff peaks. If using whipped topping, measure about 1 1/2 cups.
- Fold gently: Add one-third of the whipped cream to the peanut mixture and fold to loosen it.Fold in the rest in two additions until no streaks remain. Don’t overmix.
- Fill the cups: Spoon or pipe the cheesecake filling over the chilled crumb bases, leaving a little room on top for garnish.
- Chill to set: Cover and refrigerate for at least 2 hours, or up to 24 hours. The flavor deepens as it chills.
- Garnish and serve: Top with a swirl of whipped cream, a drizzle of chocolate or caramel, and a sprinkle of chopped peanuts or mini chips.Add a small pinch of flaky sea salt if you like sweet-salty contrast.
How to Store
- Refrigerate: Keep covered in the fridge for up to 4 days. Wait to add fresh fruit toppings until serving.
- Freeze: Freeze without fresh toppings for up to 1 month. Thaw in the fridge for several hours before serving.
- Travel tips: For parties, chill the cups on a tray.Add toppings right before serving so they stay crisp.
Why This is Good for You
This dessert isn’t health food, but it does have some perks when enjoyed mindfully.
- Protein and healthy fats: Peanut butter brings protein and monounsaturated fats that help with satisfaction.
- Portion control: Individual cups make it easier to serve a sensible amount.
- Customizable sweetness: You control the sugar level. You can reduce powdered sugar slightly without hurting texture.
- No-bake convenience: Less heat, less hassle. Great for warm days or small kitchens.
Common Mistakes to Avoid
- Using natural, runny peanut butter: It can separate and make the filling loose.Choose a standard creamy peanut butter for best structure.
- Skipping the softening step: Cold cream cheese makes a lumpy filling. Let it come to room temp.
- Overwhipping the cream: If you go to butter stage, the filling can turn grainy. Aim for medium-stiff peaks.
- Not chilling long enough: The cups need at least 2 hours to set for a clean, creamy texture.
- Overpacking the crust: Press firmly but not rock-hard, or it will be tough to spoon.
Recipe Variations
- Chocolate swirl: Melt 2–3 ounces of dark chocolate, cool slightly, and swirl into the filling before spooning into cups.Use chocolate cookie crumbs for the base.
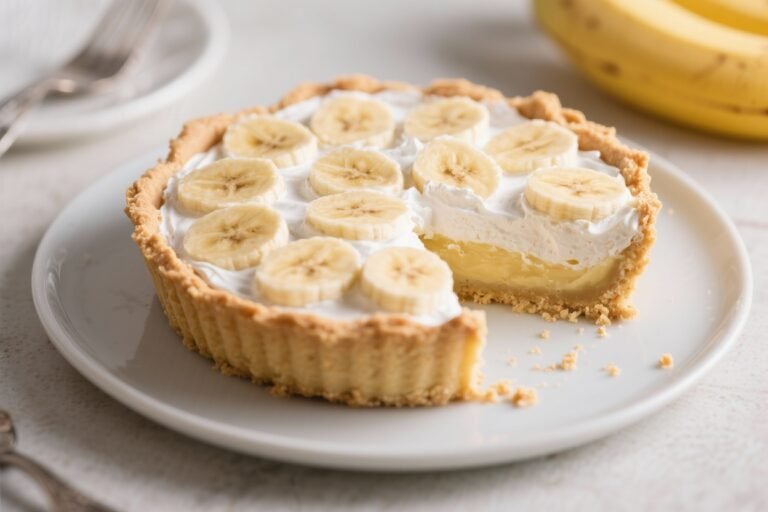
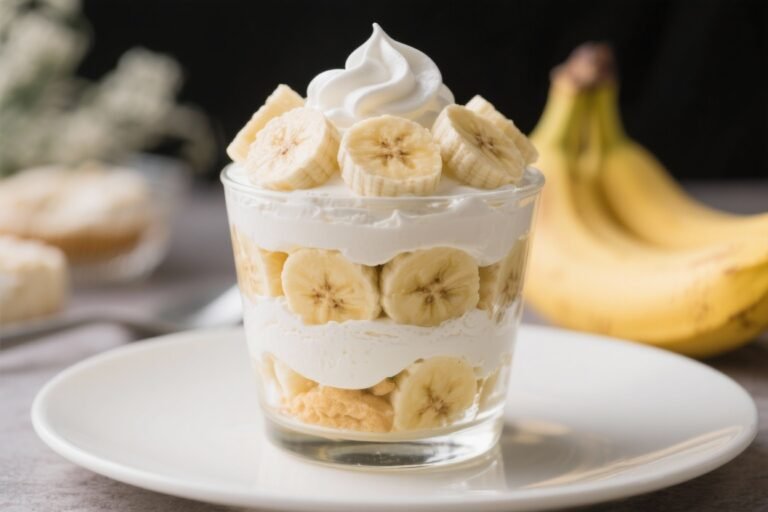
- Banana pie vibes: Add a layer of sliced banana over the crust, then top with the peanut butter filling. Finish with a drizzle of caramel.
- Salted pretzel crust: Swap half the graham crumbs for crushed pretzels. The salty crunch pairs perfectly with peanut butter.
- Greek yogurt light: Replace one-third of the cream cheese with thick Greek yogurt.The result is tangier and slightly lighter.
- Gluten-free: Use certified gluten-free graham crackers or almond flour “crumbs” mixed with butter and a bit of sugar.
- Dairy-free: Use dairy-free cream cheese, coconut whipped cream, and plant-based butter for the crust. Choose a peanut butter without dairy add-ins.
- Nutty crunch layer: Fold in finely chopped roasted peanuts for texture, or sprinkle between layers.
FAQ
Can I make this ahead?
Yes. These cups are ideal for prep.
Make them up to 24 hours ahead and keep chilled. Add toppings close to serving for best texture.
What if I only have natural peanut butter?
Stir it very well to re-emulsify, then add 1–2 teaspoons powdered milk or a little more powdered sugar to help stabilize. The texture may still be slightly looser.
Can I use store-bought whipped topping instead of heavy cream?
Yes.
Use about 1 1/2 cups whipped topping and fold it in gently. The taste will be a bit sweeter and the texture slightly lighter.
How do I fix a lumpy filling?
Make sure the cream cheese is fully softened. Beat the cream cheese, peanut butter, vanilla, and sugar together until totally smooth before folding in cream.
If needed, press the mixture through a fine sieve.
What size cups should I use?
Six- to eight-ounce cups work well. You’ll get about 6–8 servings depending on how high you fill them and how thick you make the crust.
Can I reduce the sugar?
You can cut the powdered sugar to 1/3 cup without major texture issues. Taste as you go.
If you go much lower, add a teaspoon of honey or maple for balance.
Why is my crust crumbly?
It probably needs a touch more butter. Add another teaspoon of melted butter and mix. Also press the crumbs down firmly and chill before filling.
How long can they sit out?
Keep them chilled as much as possible.
For serving, 1–2 hours at cool room temperature is fine, but return leftovers to the fridge promptly.
Can I make one big dish instead of cups?
Yes. Press the crust into an 8-inch square pan or a 9-inch pie dish. Spread in the filling and chill 3–4 hours before slicing.
What can I use instead of peanut butter?
Almond butter or sunflower seed butter both work.
Choose a thicker, no-stir variety for best results and adjust sweetness to taste.
In Conclusion
No-Bake Peanut Butter Cheesecake in a Cup is simple, satisfying, and endlessly flexible. It delivers that classic cheesecake feel without turning on the oven, and the individual servings make it perfect for any occasion. Keep it classic with graham crackers and a drizzle of chocolate, or play with crusts, swirls, and toppings.
With a few pantry staples and a little chill time, dessert is handled.